
How to send or schedule a message
In this guide, you will learn:
- How to send a message to a patient
- How to schedule a message
How to send a message to patient
You can send messages to the patient from the clinical portal. Go to the "Messaging" tab and click “New message”. Choose either a blank message or a template you would like to use.
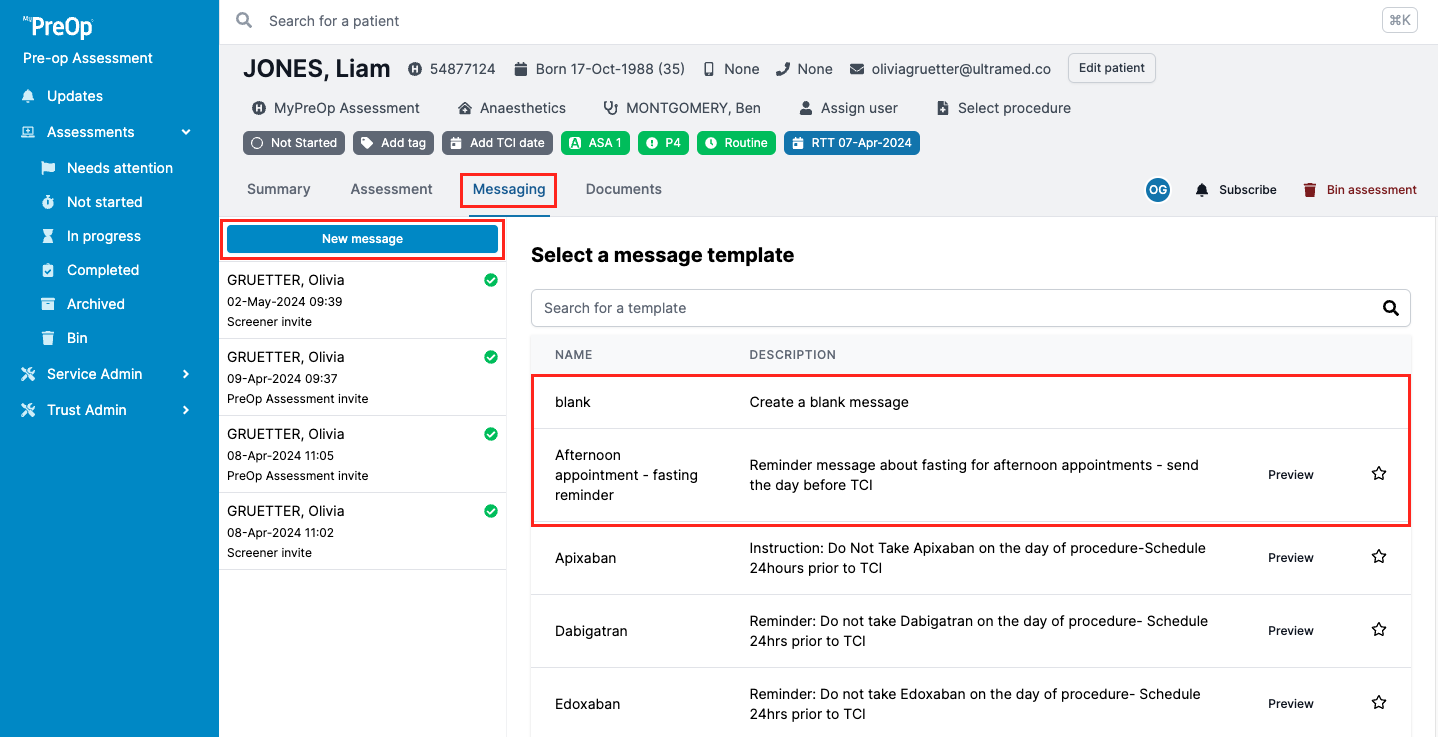
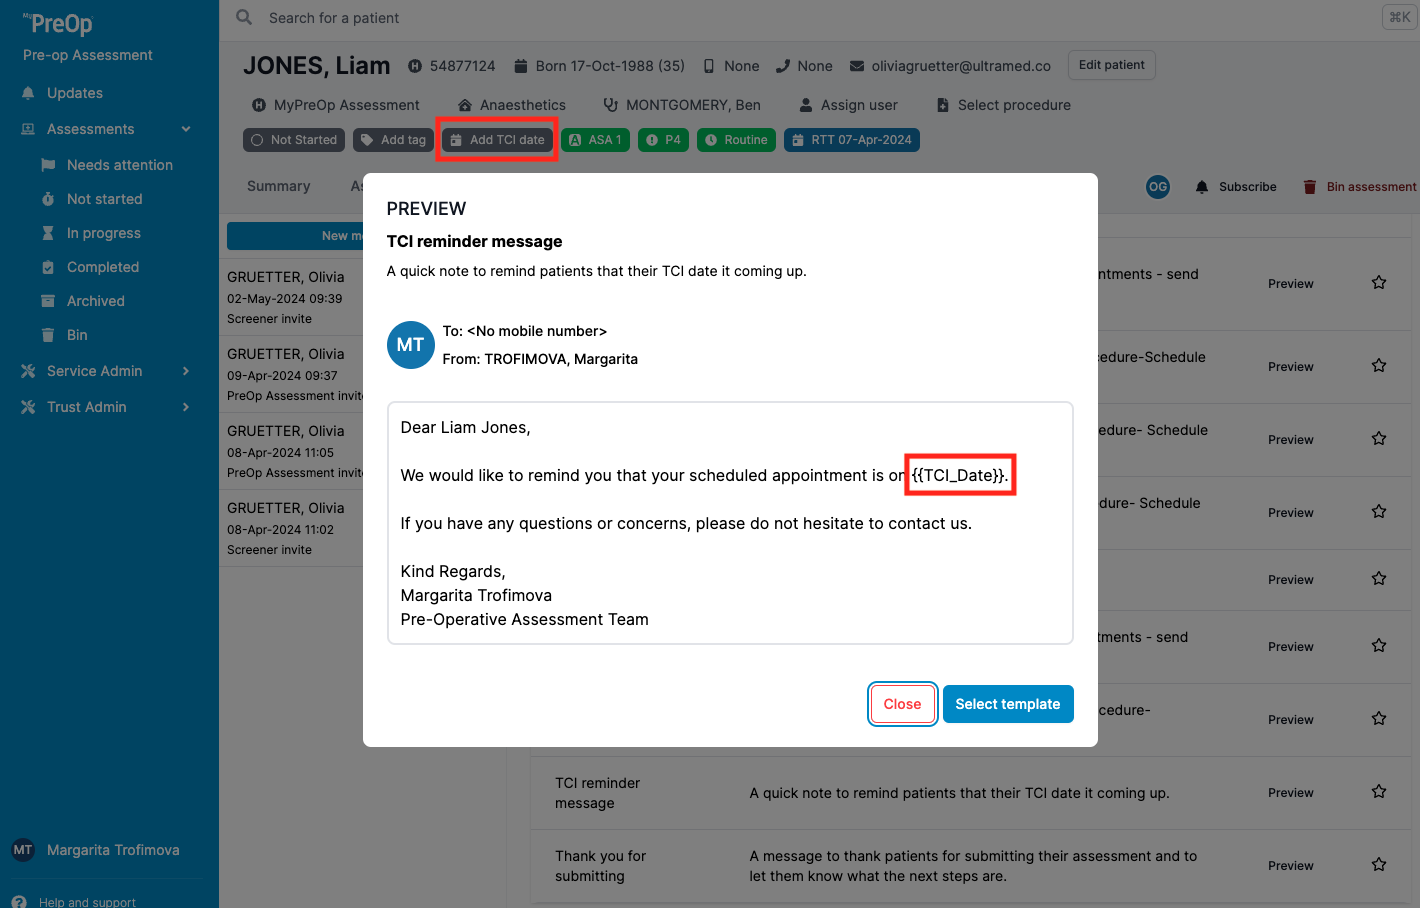
If a template is selected, the system will pull information from the patient page into the placeholders. If the information for the placeholder or patient contact details are missing, the template will be incomplete, and you will see an amber warning banner.

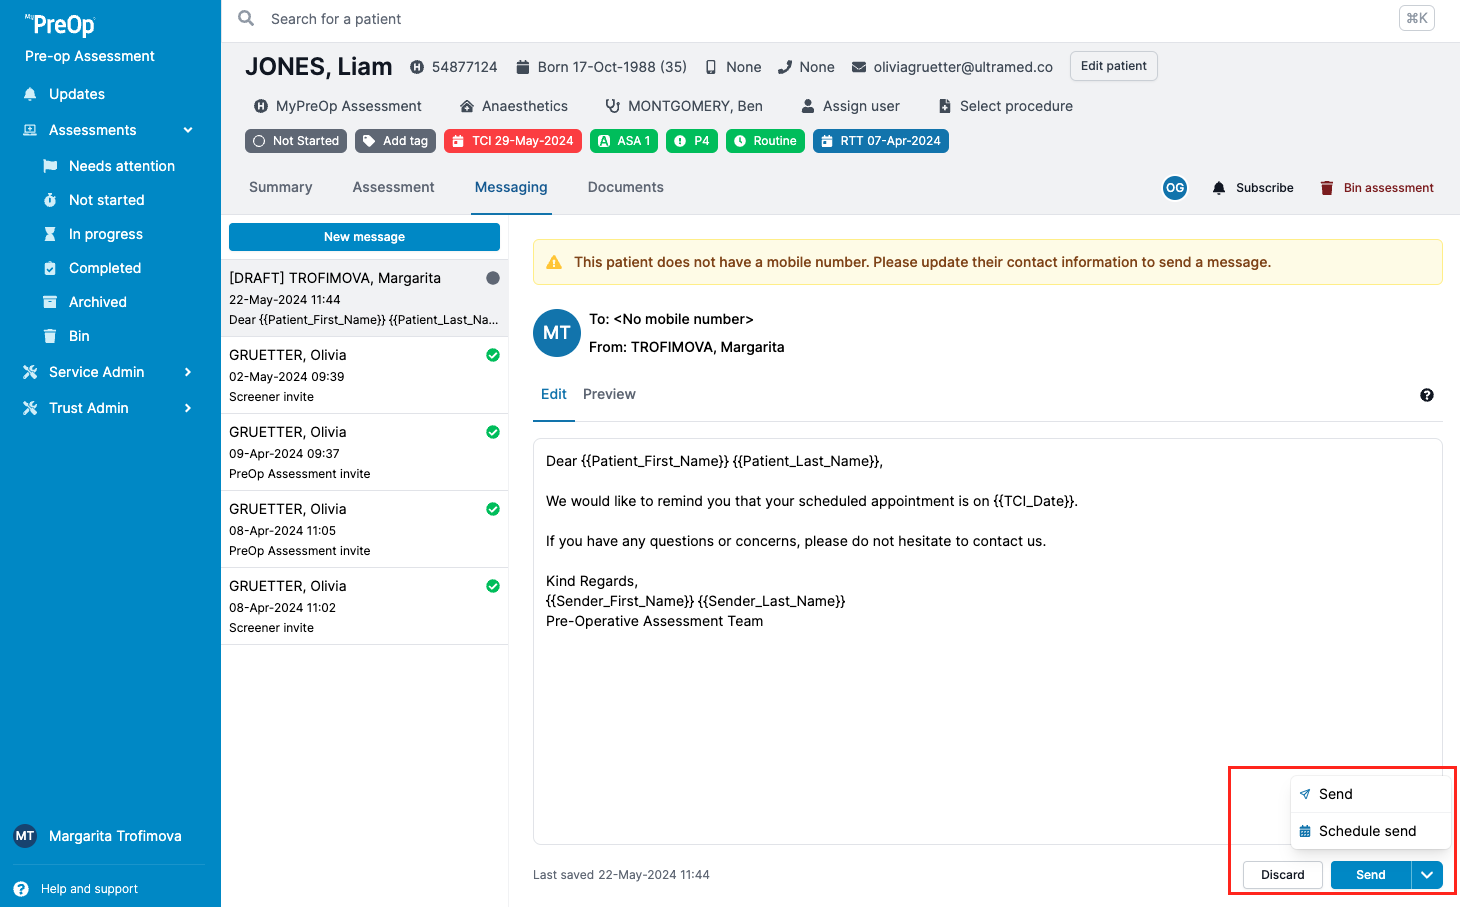
Update the details and click “Send”.
How to schedule a message
You can write your message in the same way as usual, either by using a template, or by creating it from scratch. When you are ready to send your message you can either click send to send it immediately, or click the arrow on the right-hand side of the button, which will give you the additional option to ‘schedule send’, which allows you to send the message at a later time.
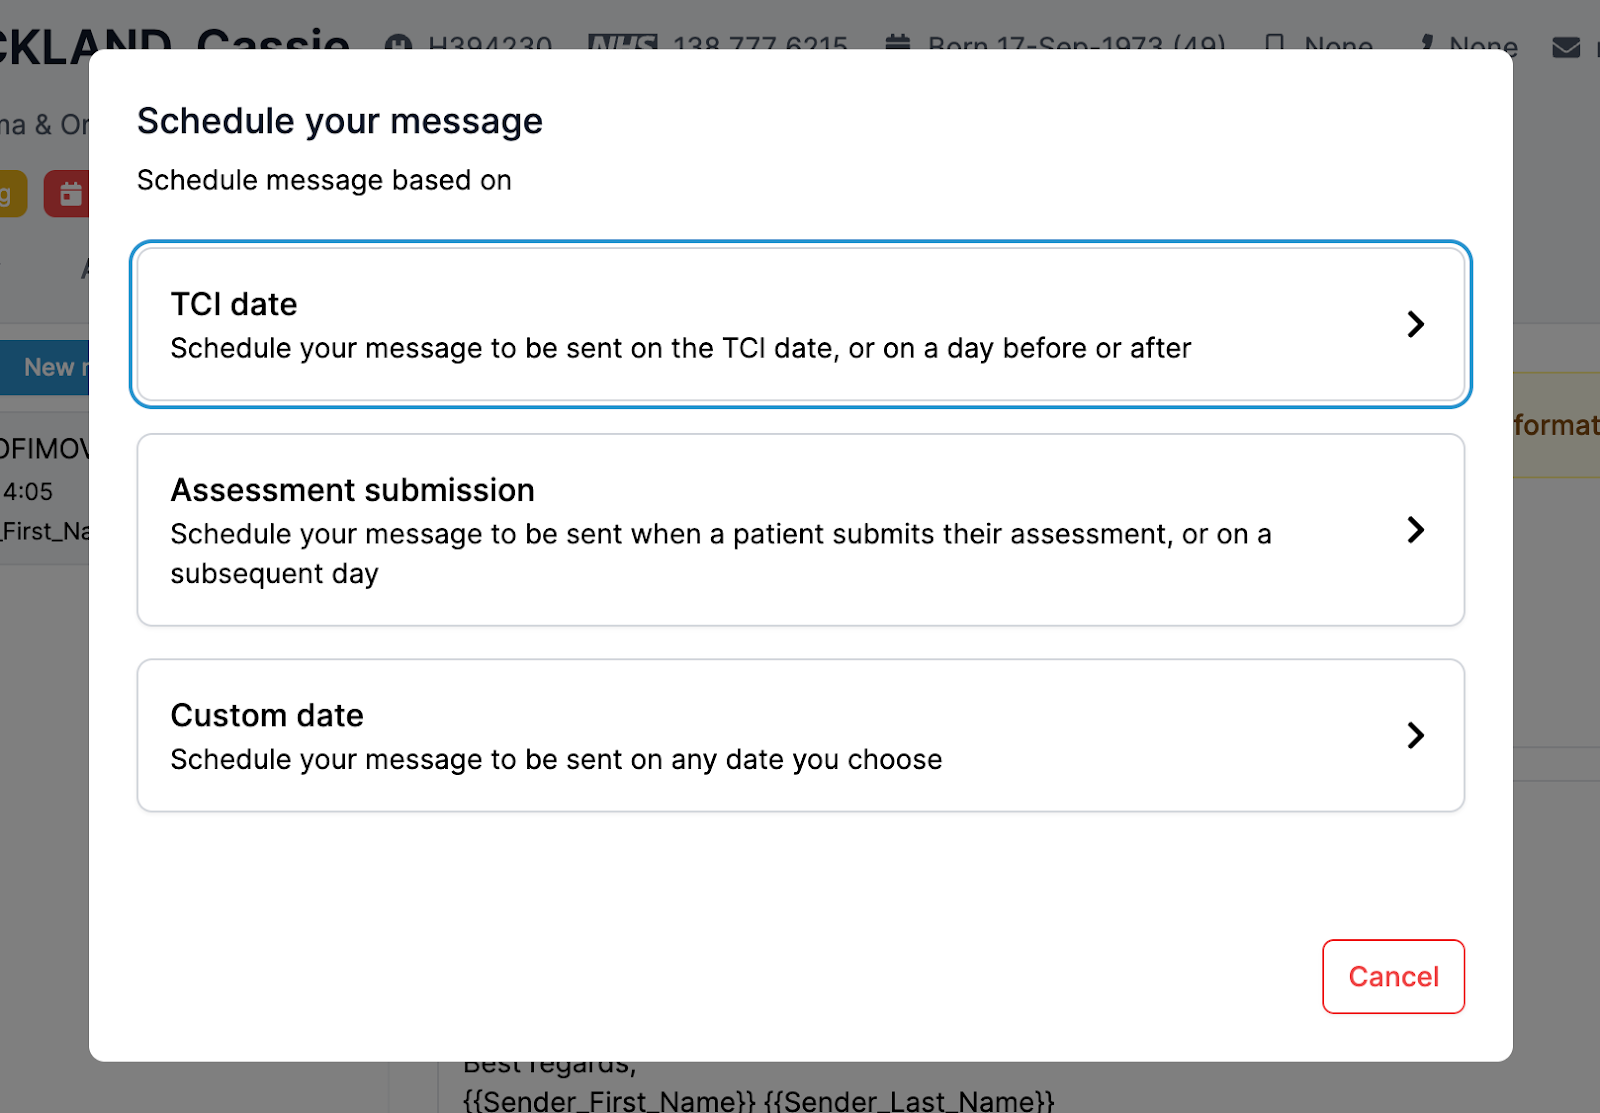
Messages can be scheduled in three ways:
- By TCI date – schedule your message to be sent on the TCI date, or on a day before or after
- By assessment submission – schedule your message to be sent when a patient submits their assessment, or on a subsequent day
- By custom date – schedule your message to be sent on any date you choose
Scheduling a message based on the TCI date
You can schedule a message based on the TCI date even before the TCI is added. Once the TCI date is entered, the message scheduling will be based on the updated TCI date. Similarly, if you update/change/remove the TCI date after scheduling a message, the scheduling will adjust according to the most recent TCI date added to the system.

Please note: if you have several messages scheduled to be sent before the TCI date, for example messages to be sent 10 days before, and 3 days before, and you add a TCI date that is 1 day away, it will cause both messages to be sent immediately at the same time.
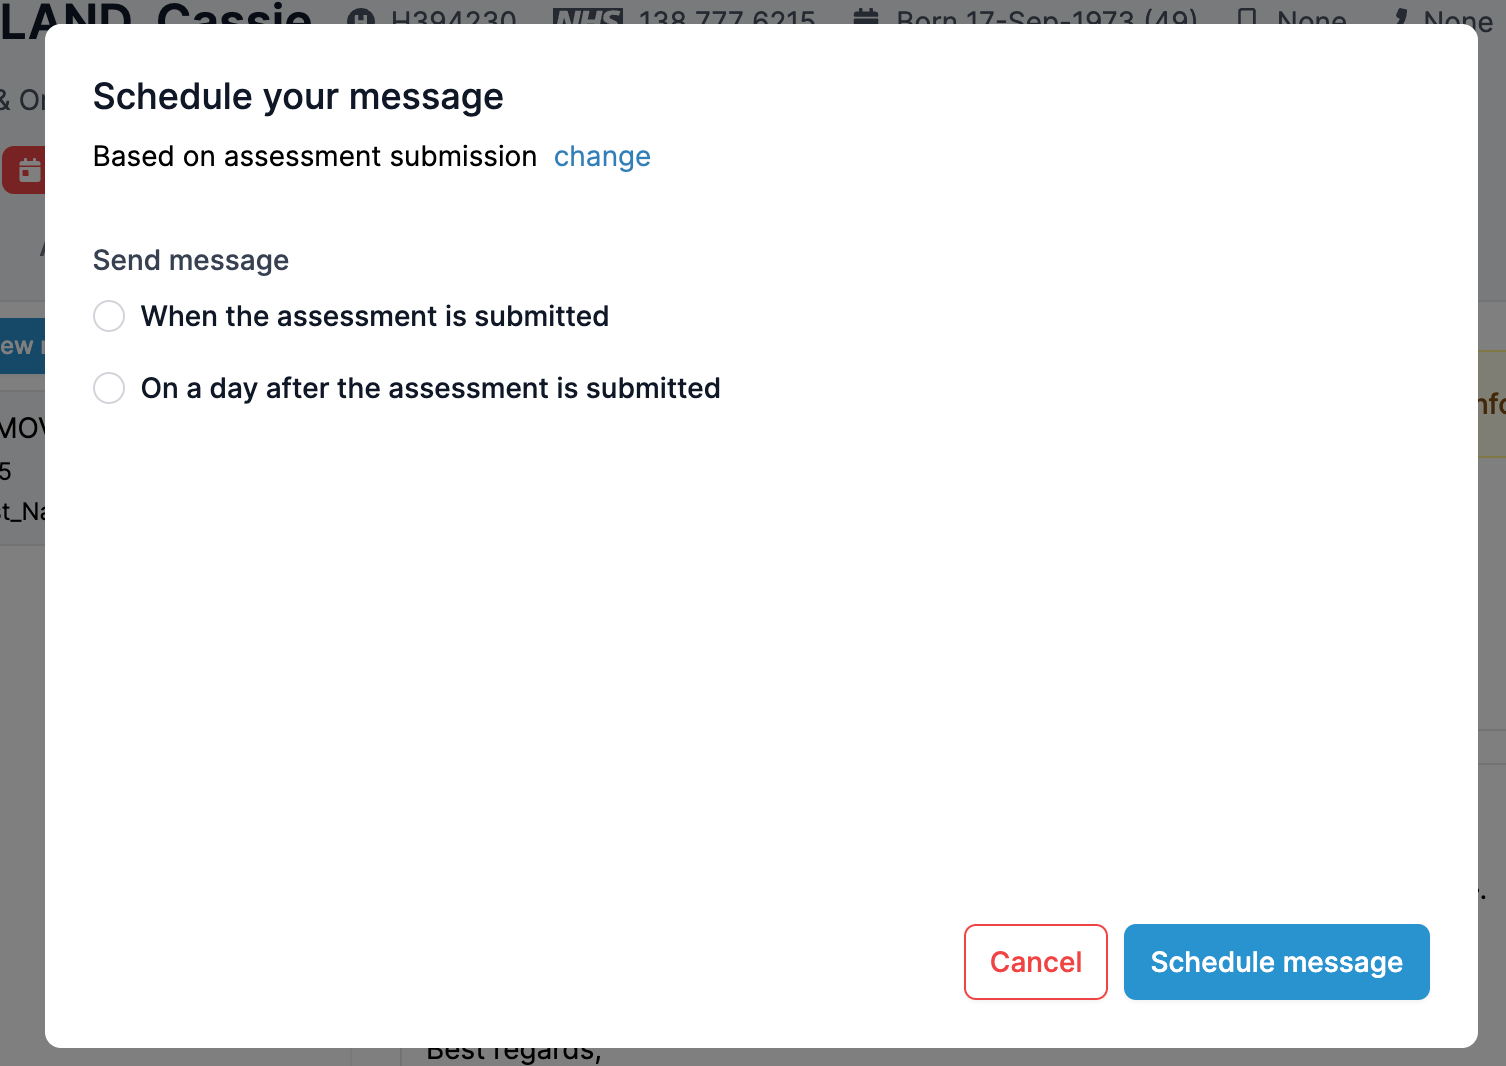
Scheduling a message based on the assessment submission
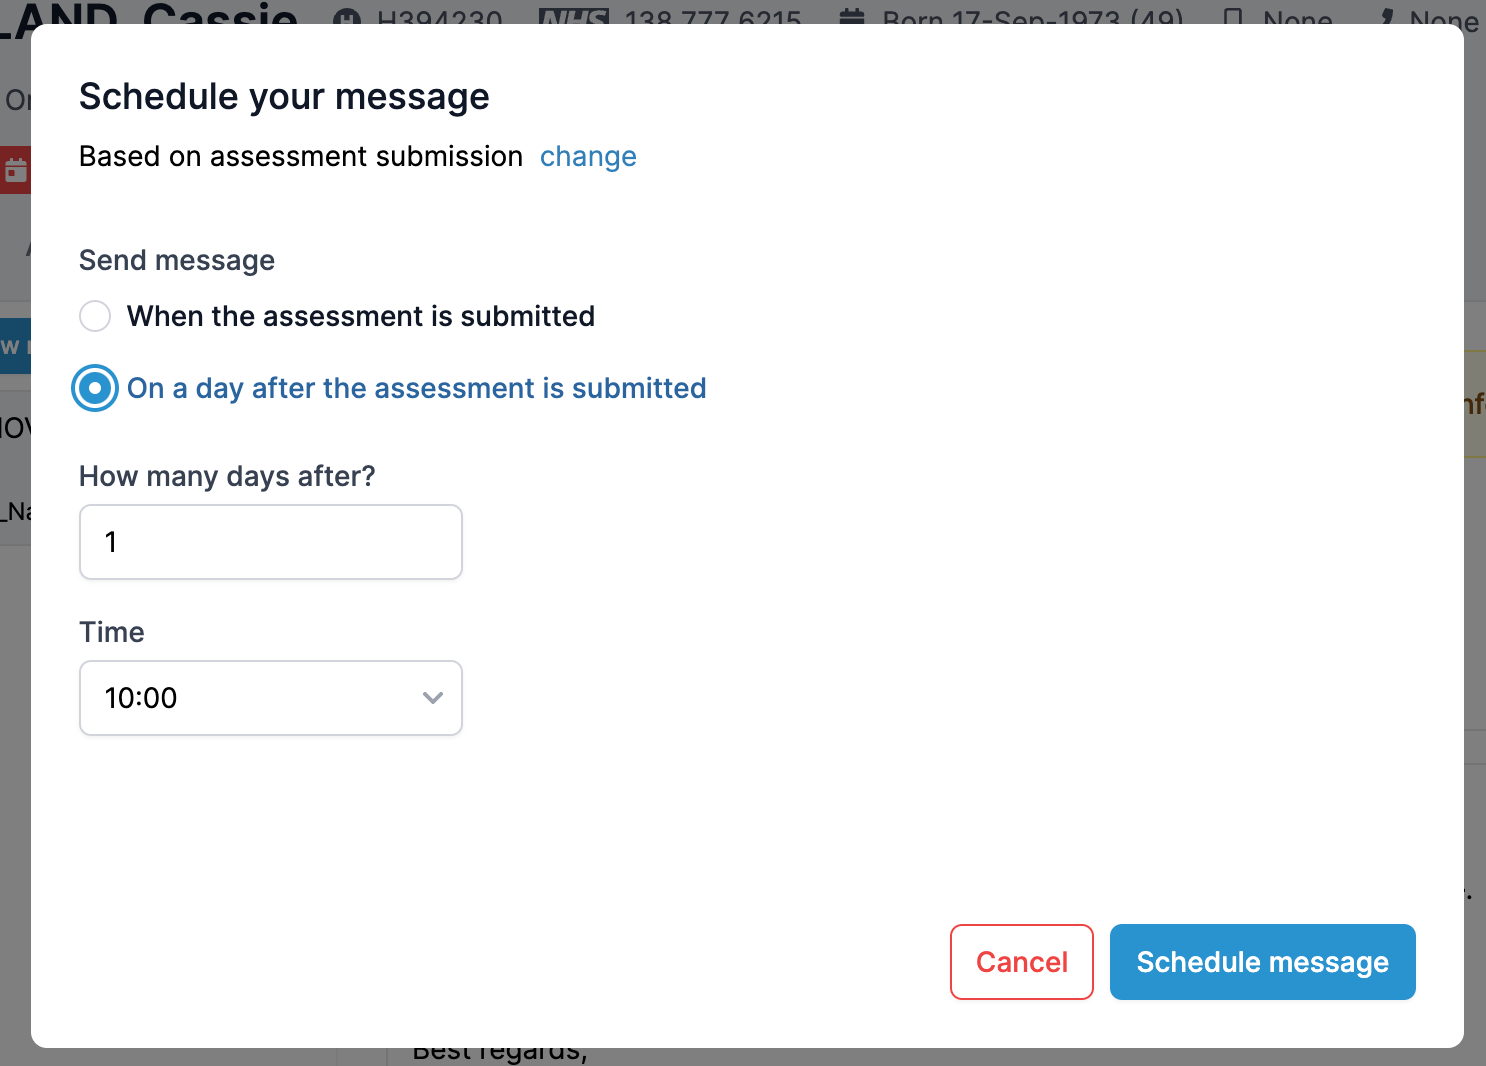
You can schedule a message to be sent based on the patient’s assessment submission. When selecting this method, you will be given the option to send a message either when the assessment is submitted or on a specific day following the assessment is submitted.
When selecting the method above, you will be prompted to provide additional details about the exact time you want the message to be sent or how many days after the submission you would like the message to be received.
After this, the message will appear in the message list, showing information about its scheduled time. You can still unschedule or edit the message up until the time that it is sent.
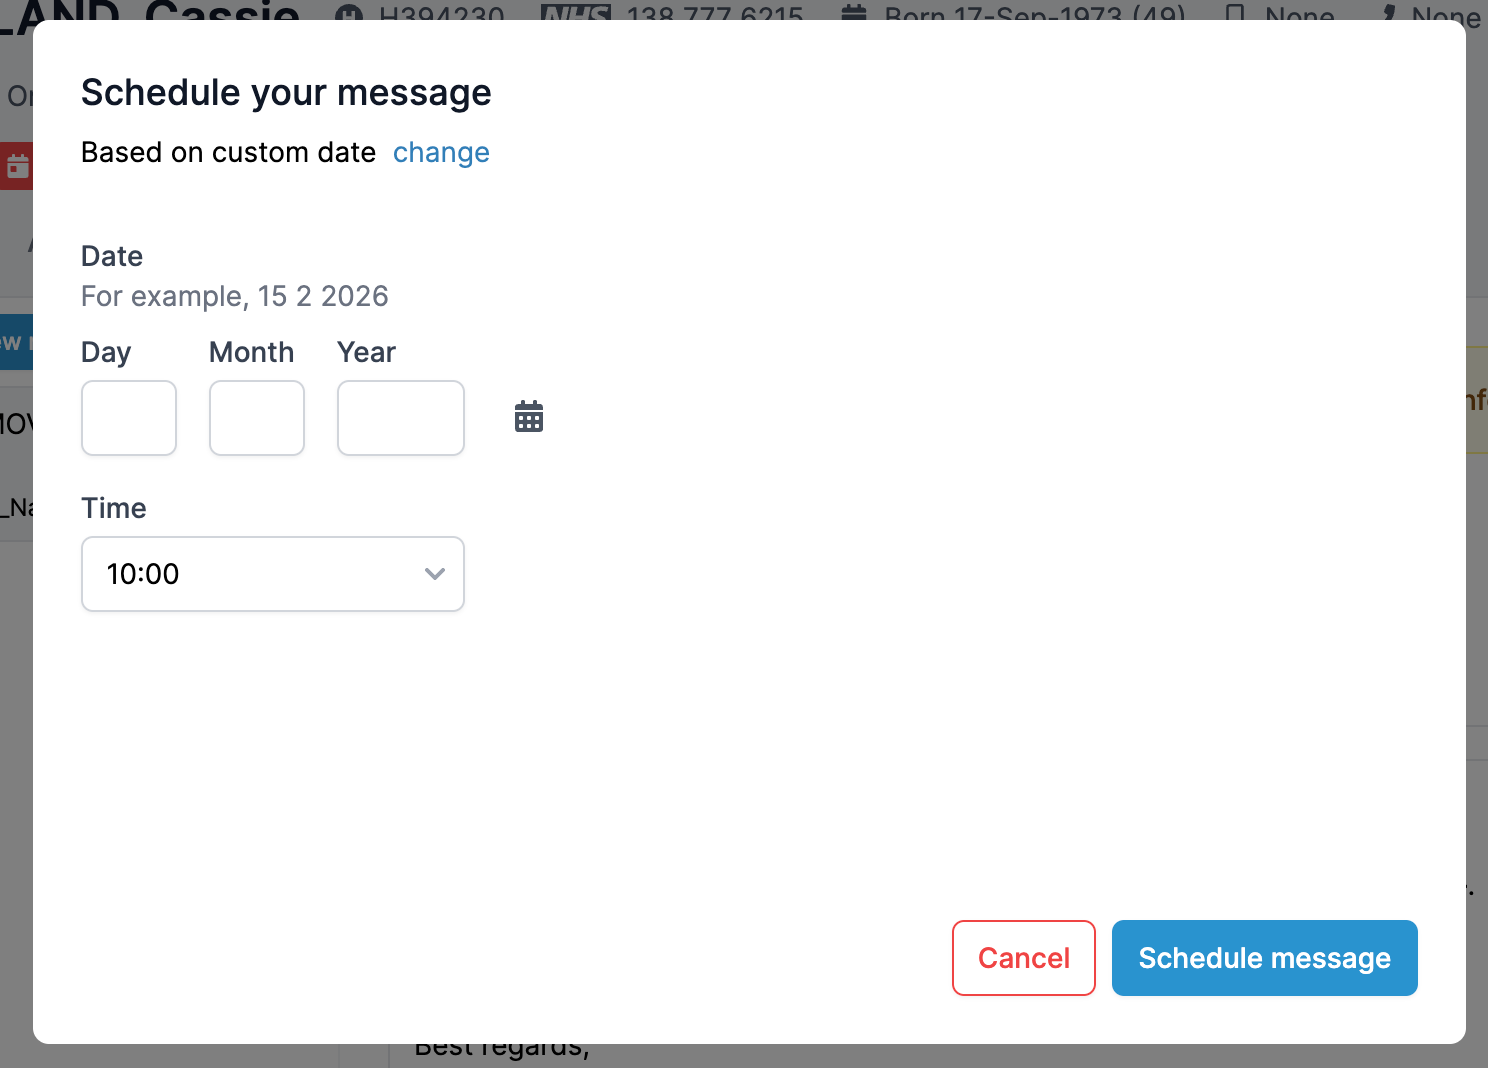
Scheduling a message to be sent on a custom date
You can choose to send a message on a custom date. Once this option is selected, you will be able to specify the exact date and time for the message to be sent.
After this, the message will appear in the message list, showing information about when it is set to be scheduled. You can still unschedule or edit the message up until the time it is sent.
Please note: if you have placeholders in the message that doesn’t yet exist (e.g. TCI date hasn’t been added yet), you can schedule the message, but it will NOT send unless the placeholder is available at the scheduled time. If the placeholder is missing when the scheduled time arrives, the message will fail. To resend, you will need to create a new message.
If a patient with scheduled messages is moved into the bin, their messages will be deactivated, and any future messages will not be sent to the patient while they remain in the bin. If the patient is later restored from the bin back to active status, their messages will be restored and any messages that are still scheduled for the future will be sent as normal. In this case you will need to ensure you check that all the messages are still relevant, and remove those that are not.