How to view an assessment
In this guide, you will learn about:
- How to open an assessment
- Multiple assessment forms and statuses
- How to edit an existing form or send a new form to the patient
- How to identify and review changes made to questionnaires
- Clinical notes and suggested tasks
How to open an assessment
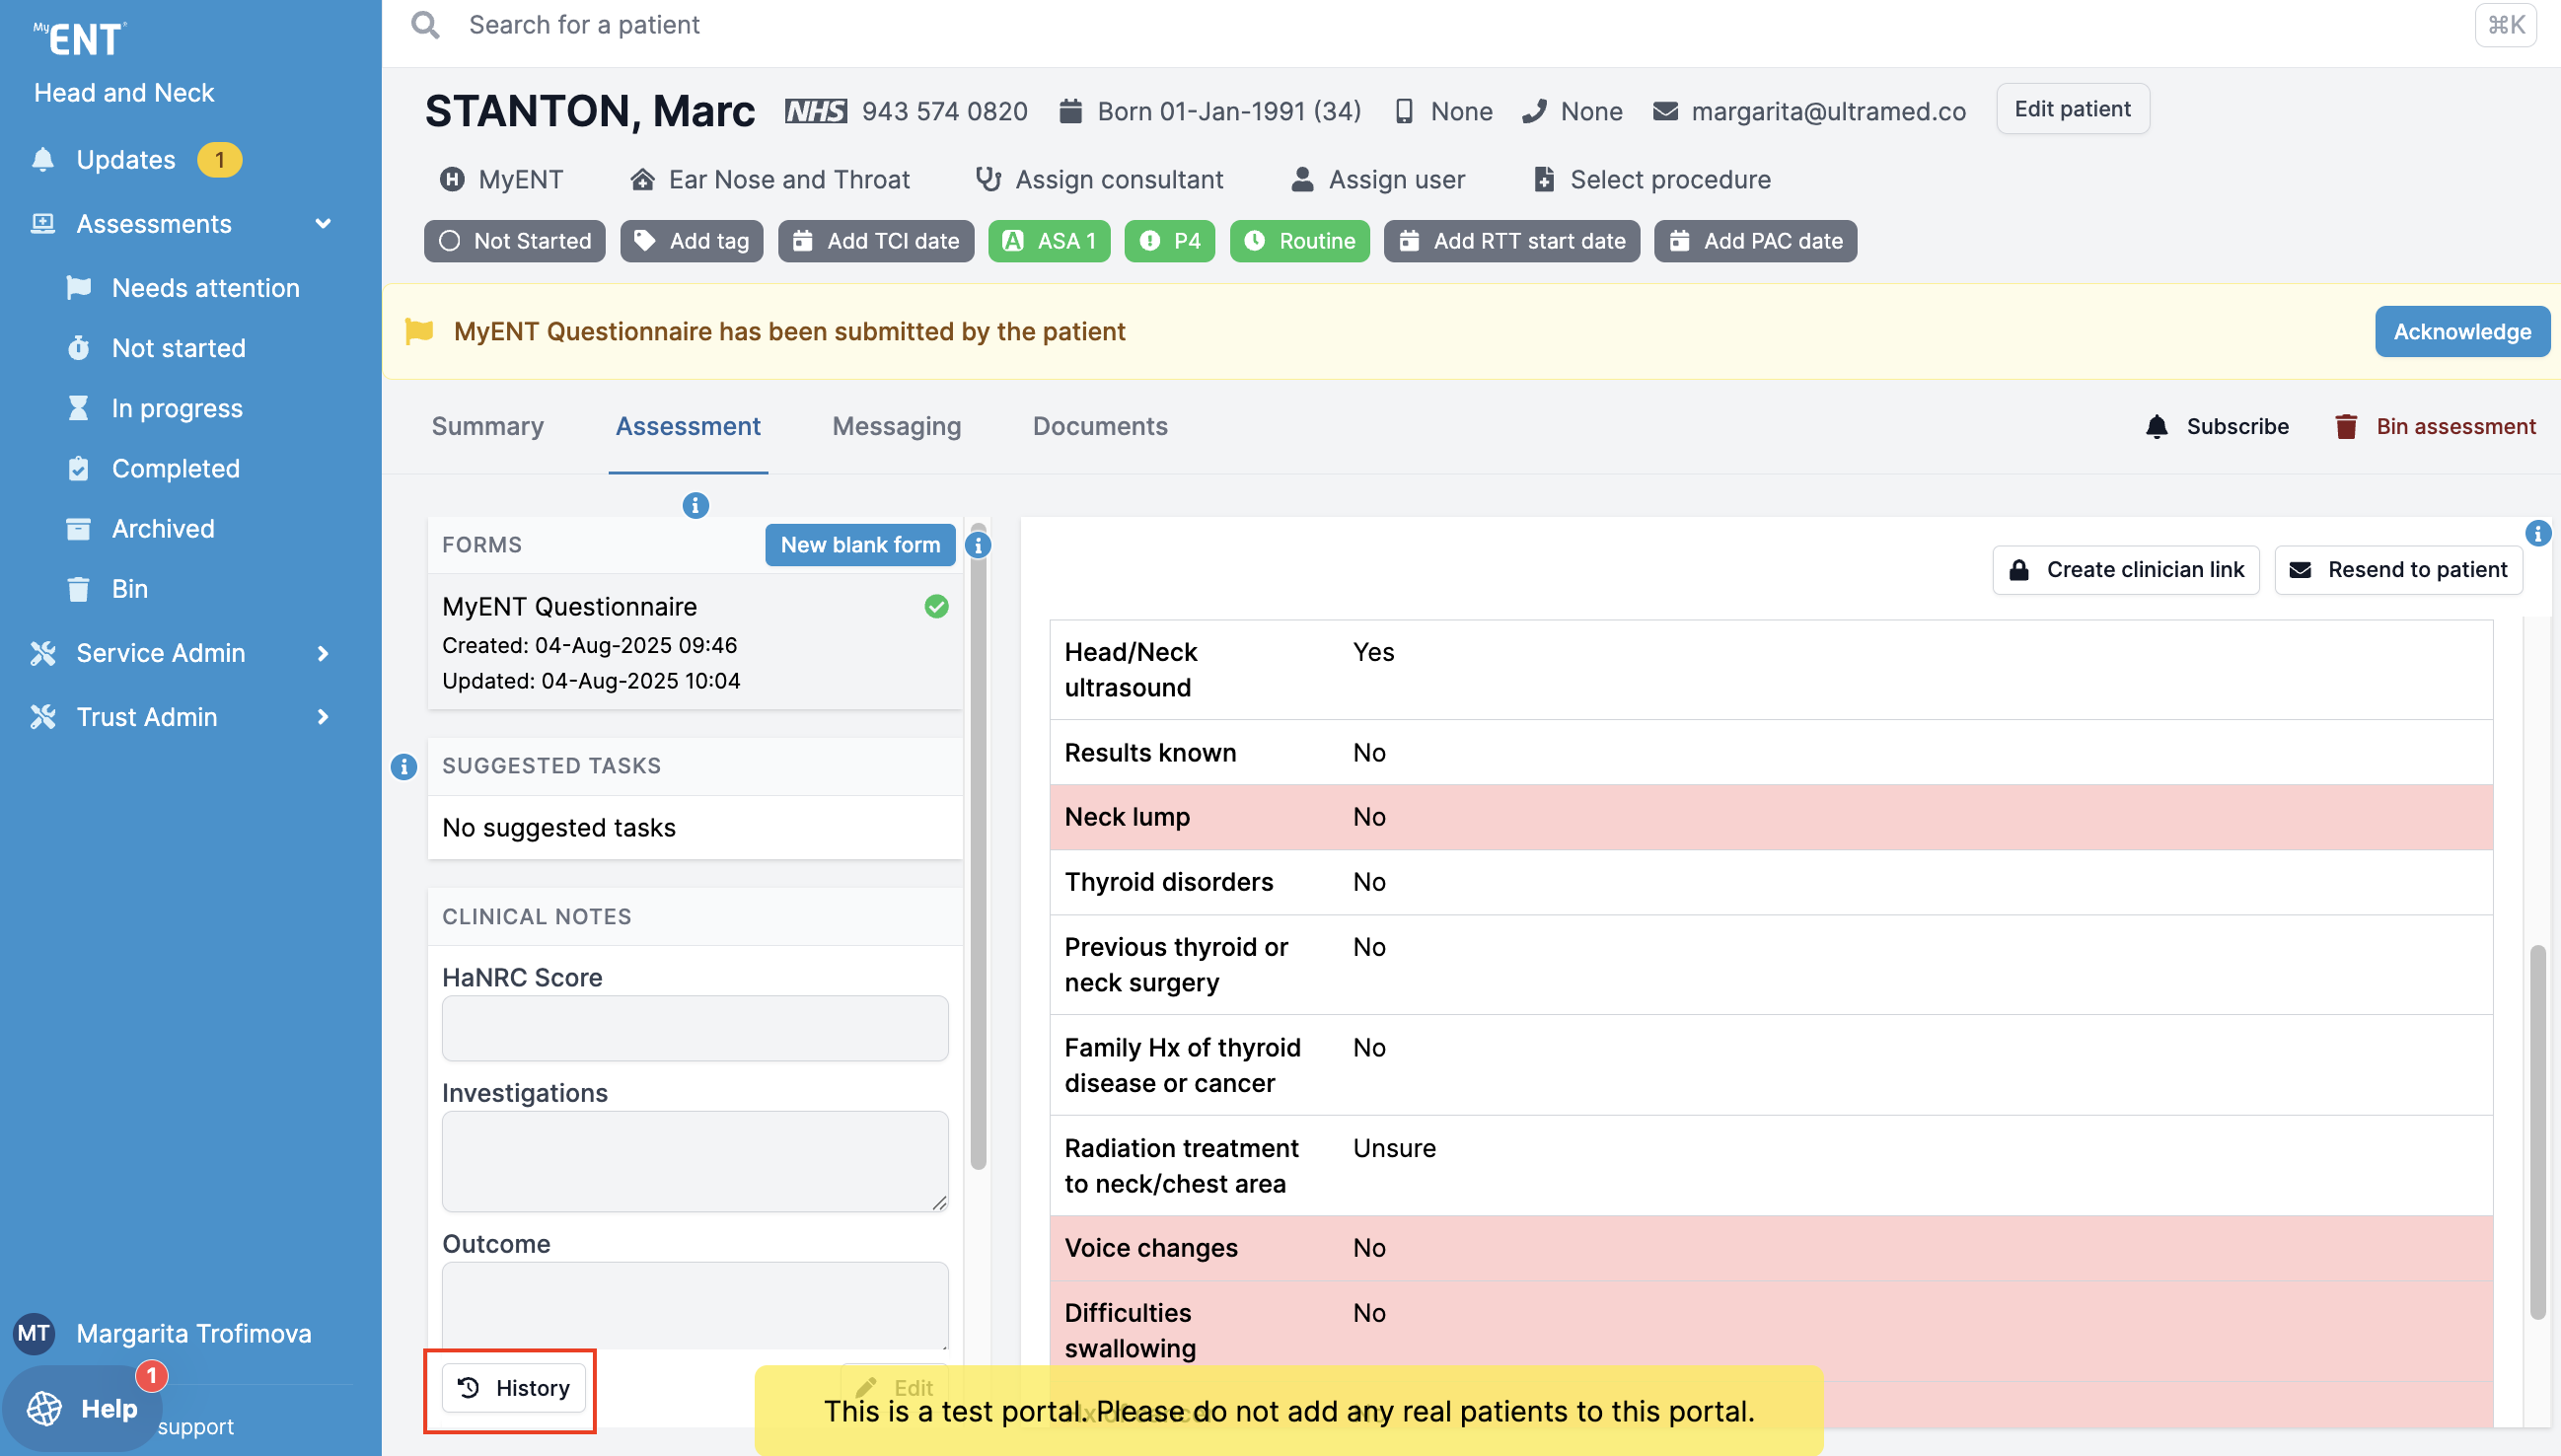
To open an assessment, head to the Assessment tab on the patient page. You will be able to view the assessment on the right hand side.
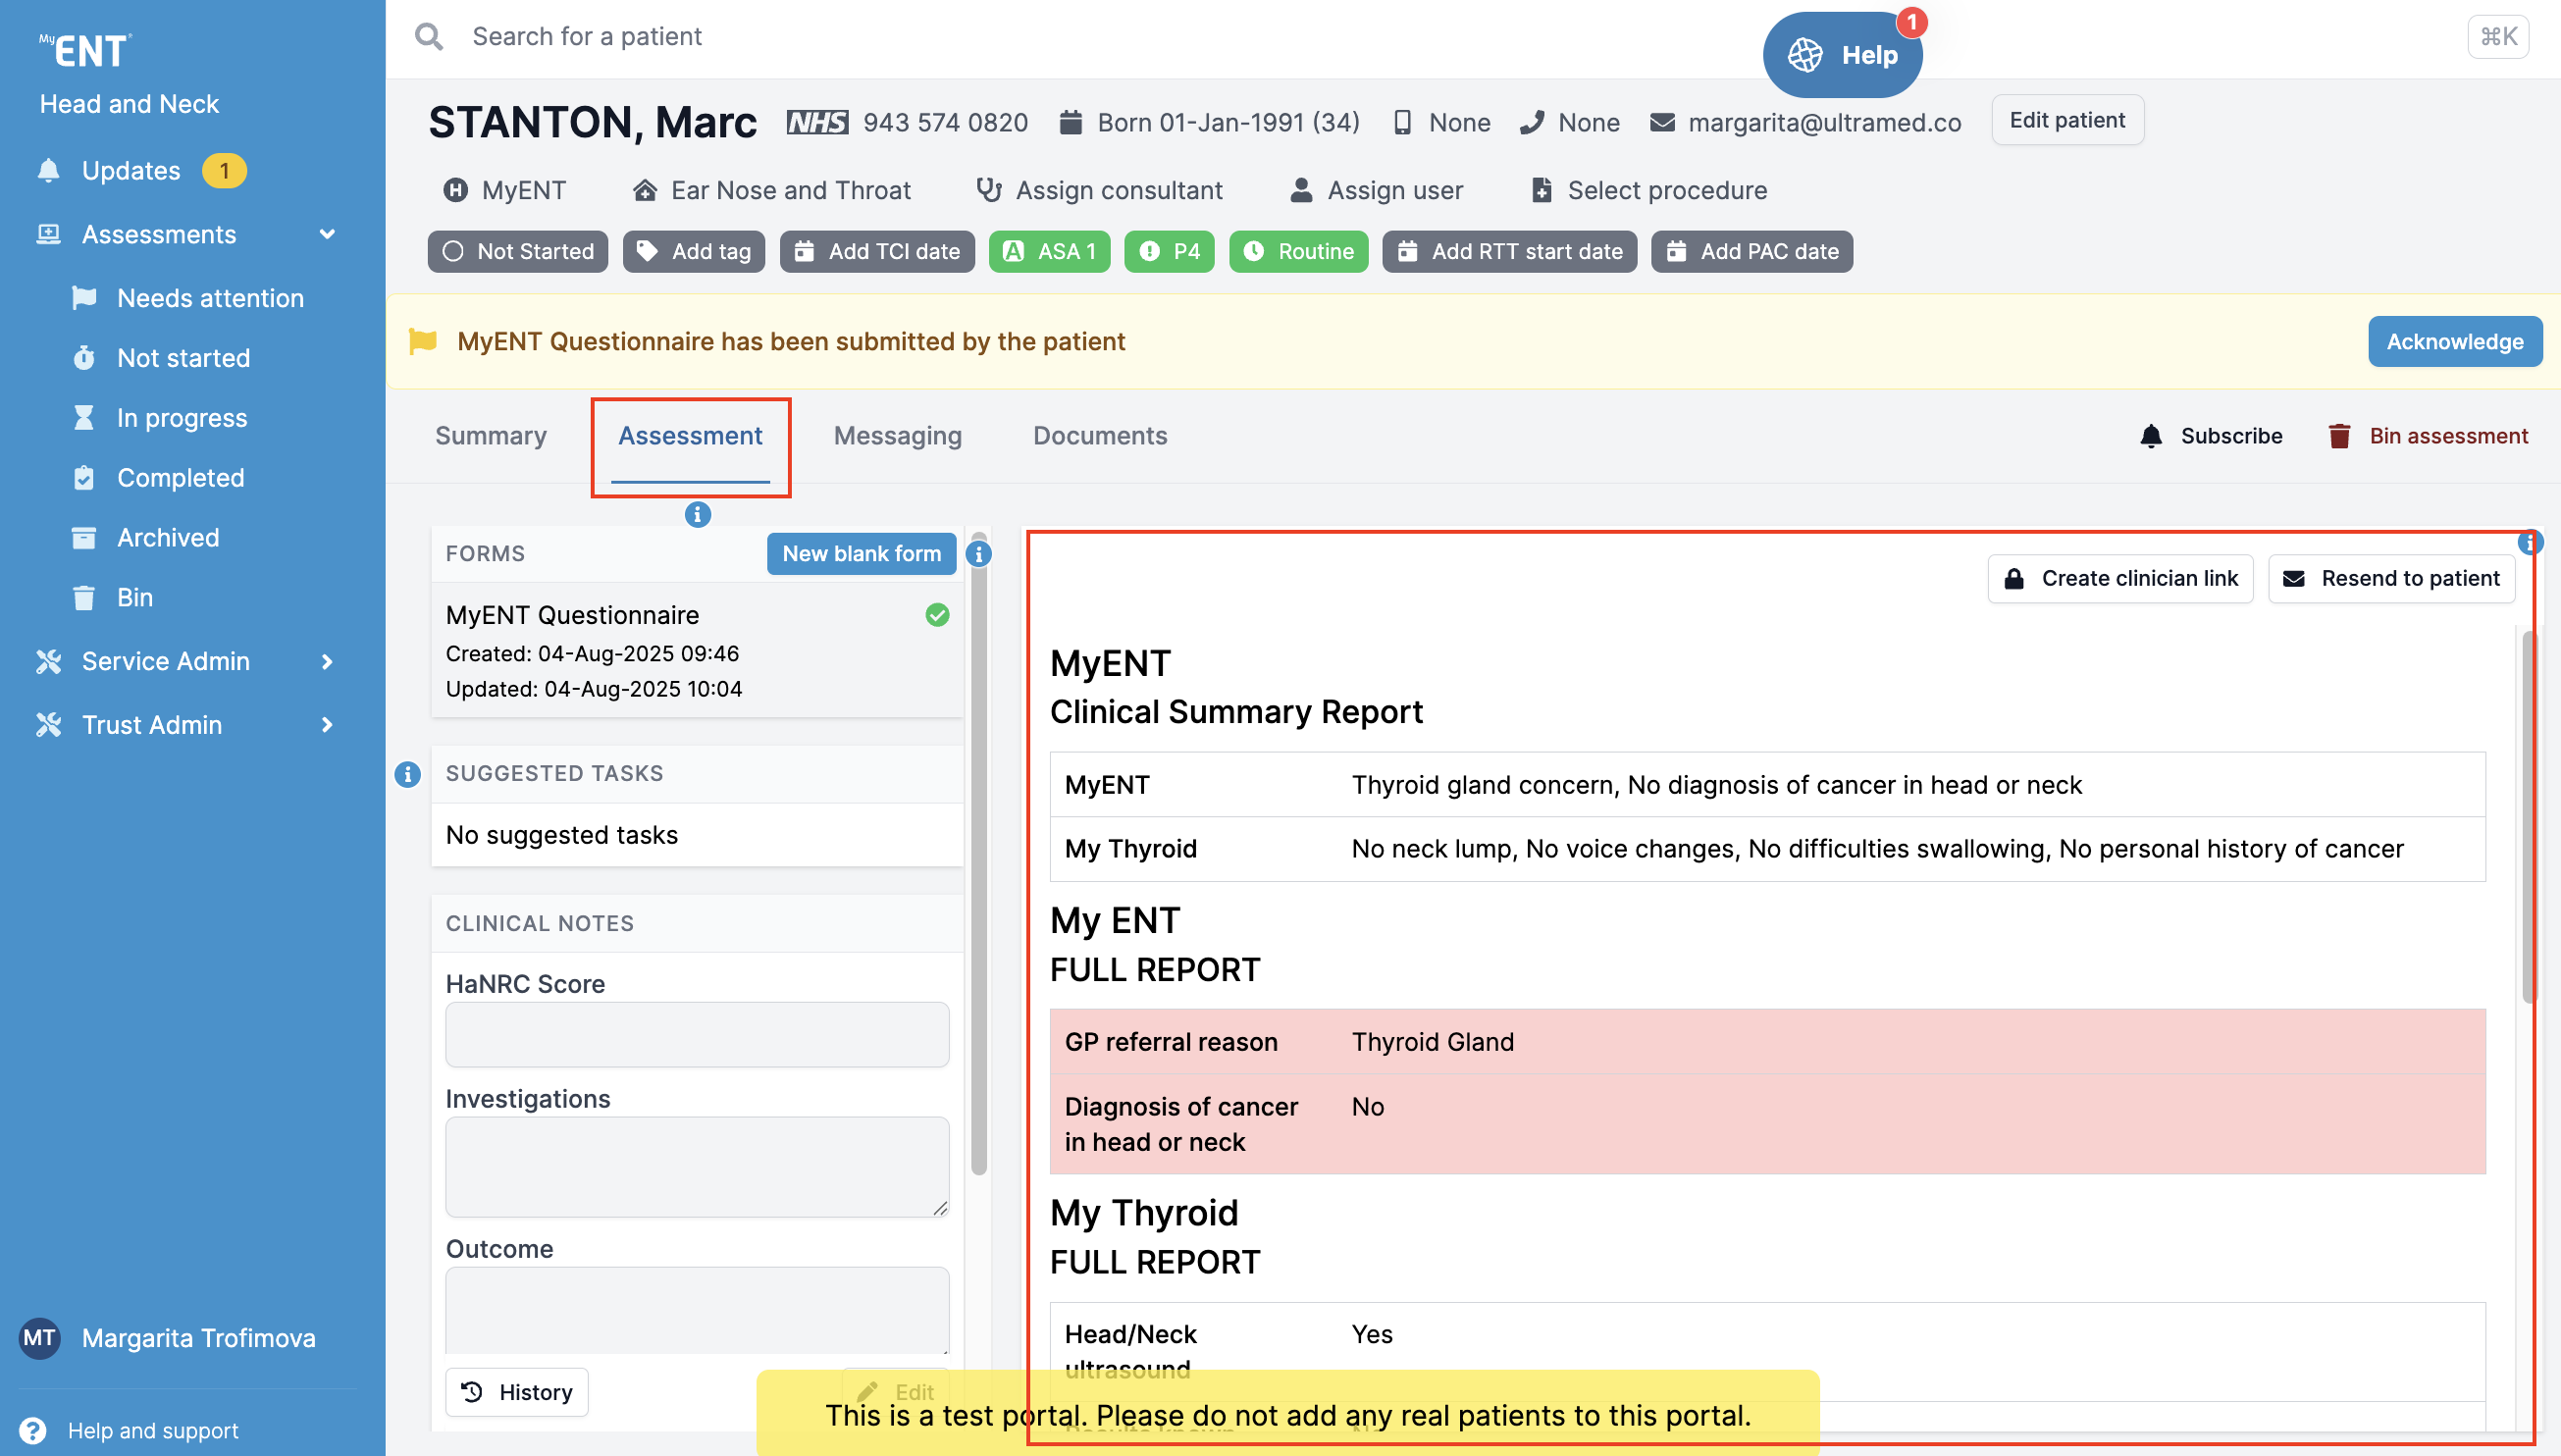
Multiple assessment forms and statuses
The Multiple assessment forms is a feature that allows sending different questionnaires to the same patient. Examples of such forms include a Screener questionnaire and a full Pre-op assessment.
You will be able to see the type of form as well as its status on the left side of the Assessment tab.
To learn about the status of the assessment, view its progress and see the patient answers as they are added, simply click on the form from the list. The amber banned at the top of the assessment will display all information related to the assessment.
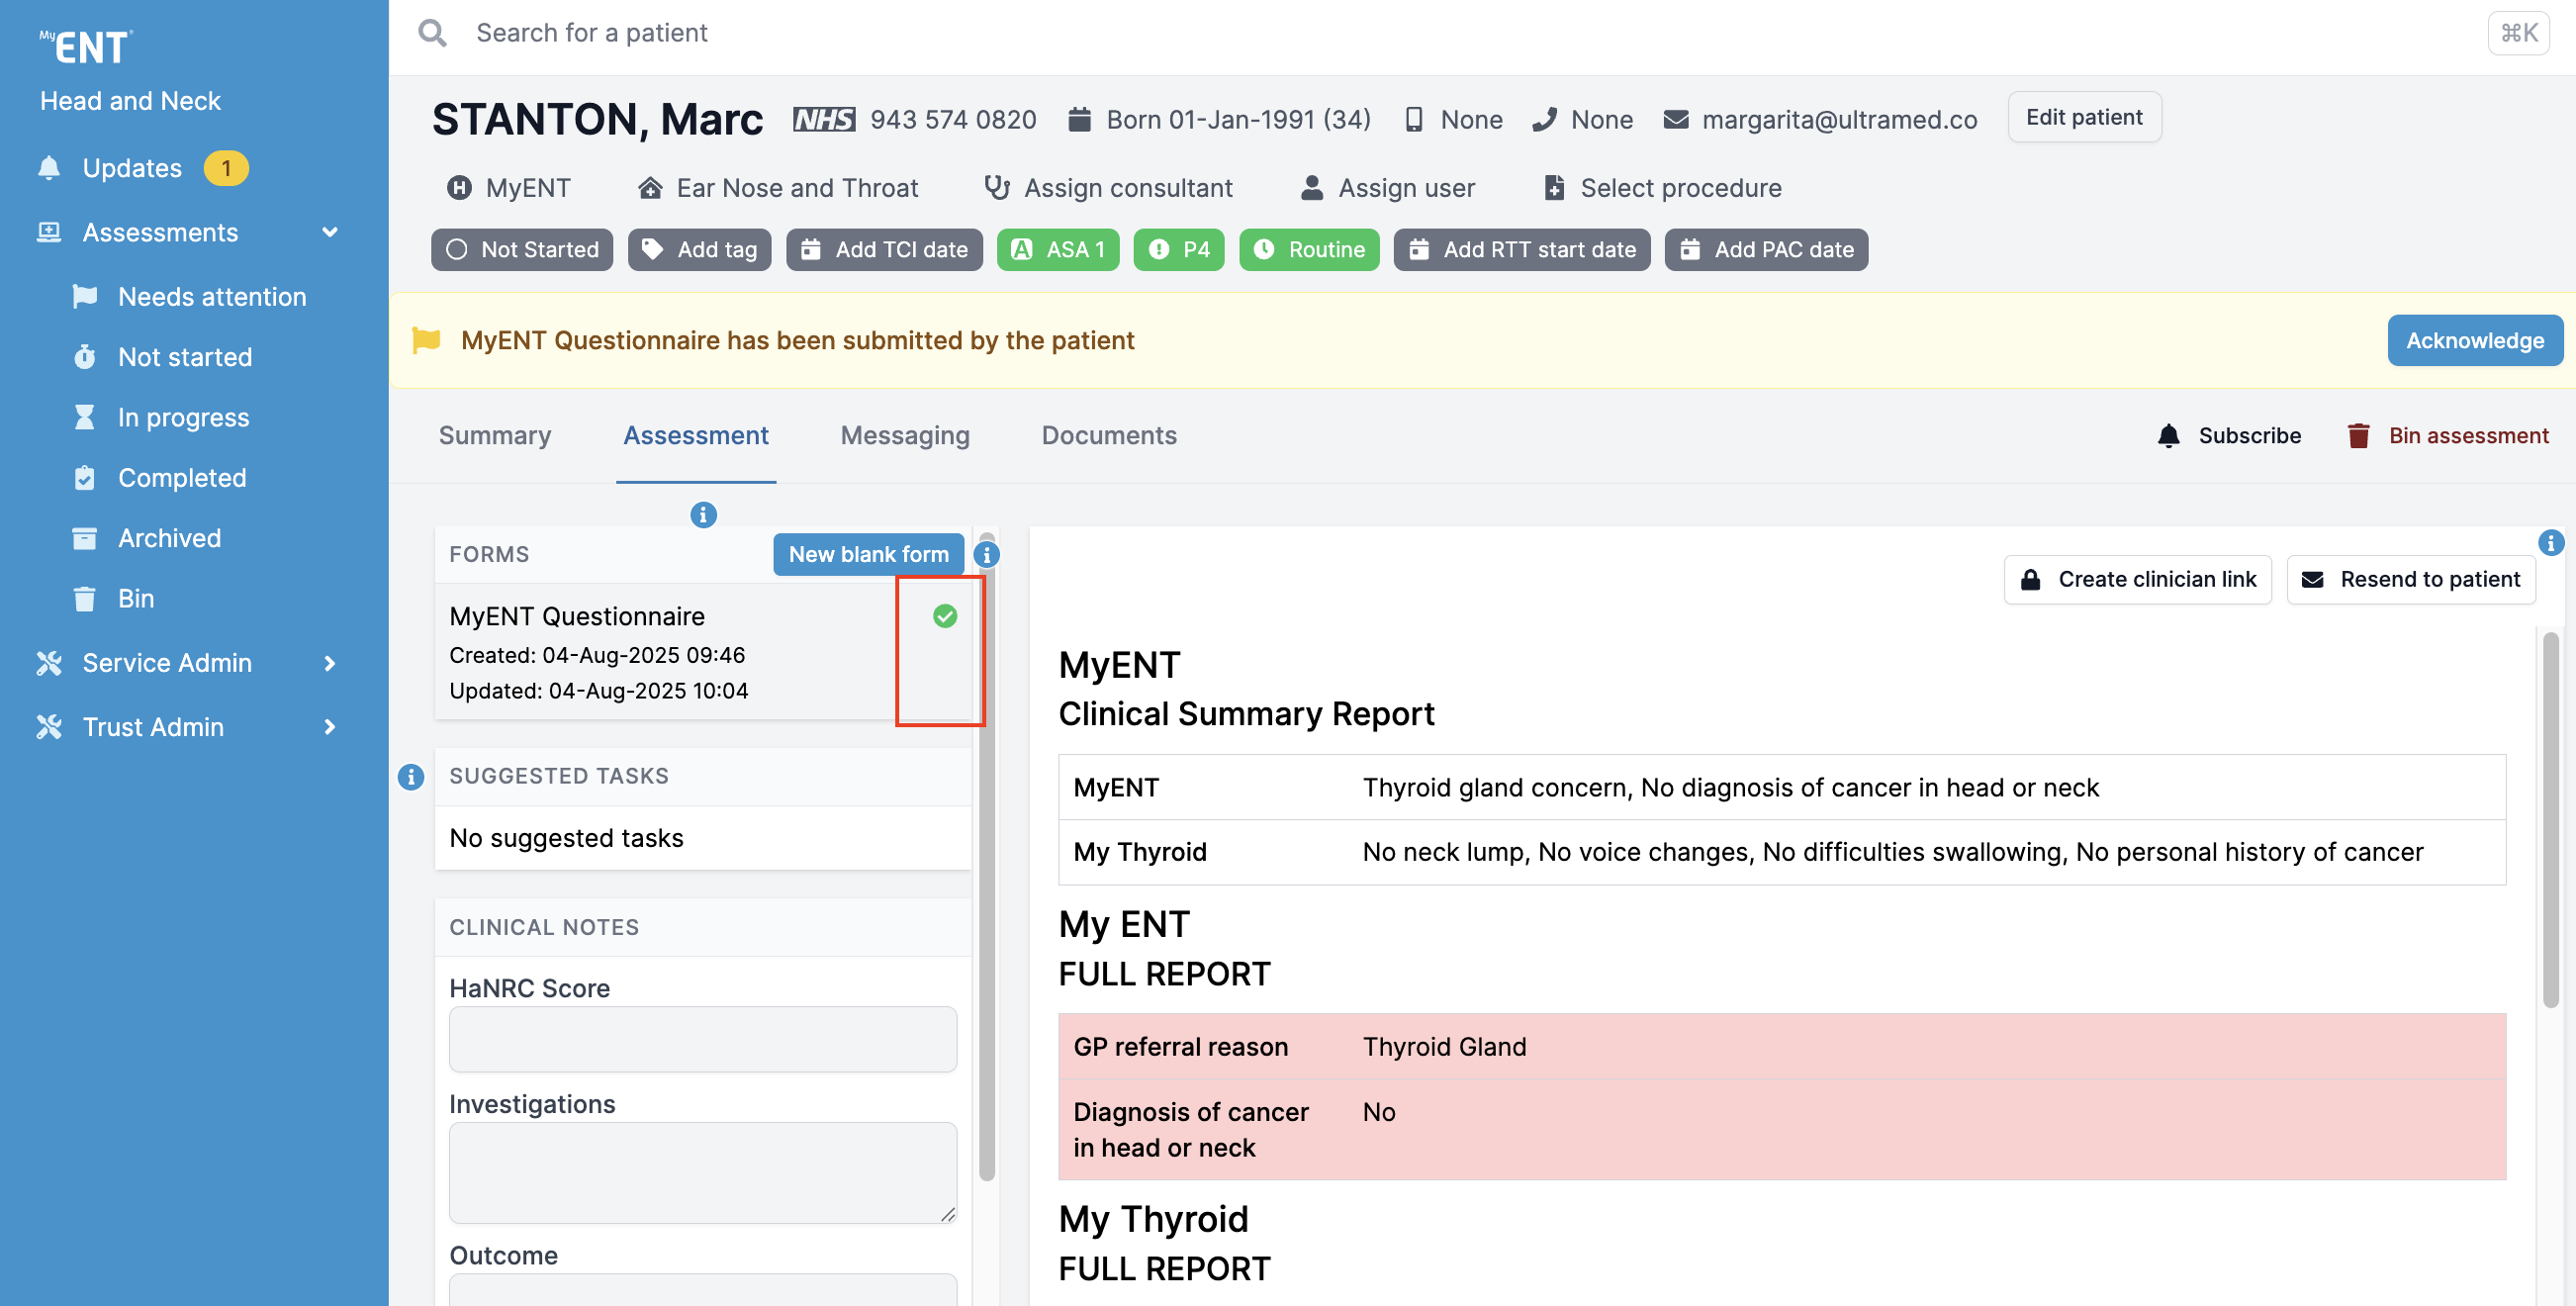
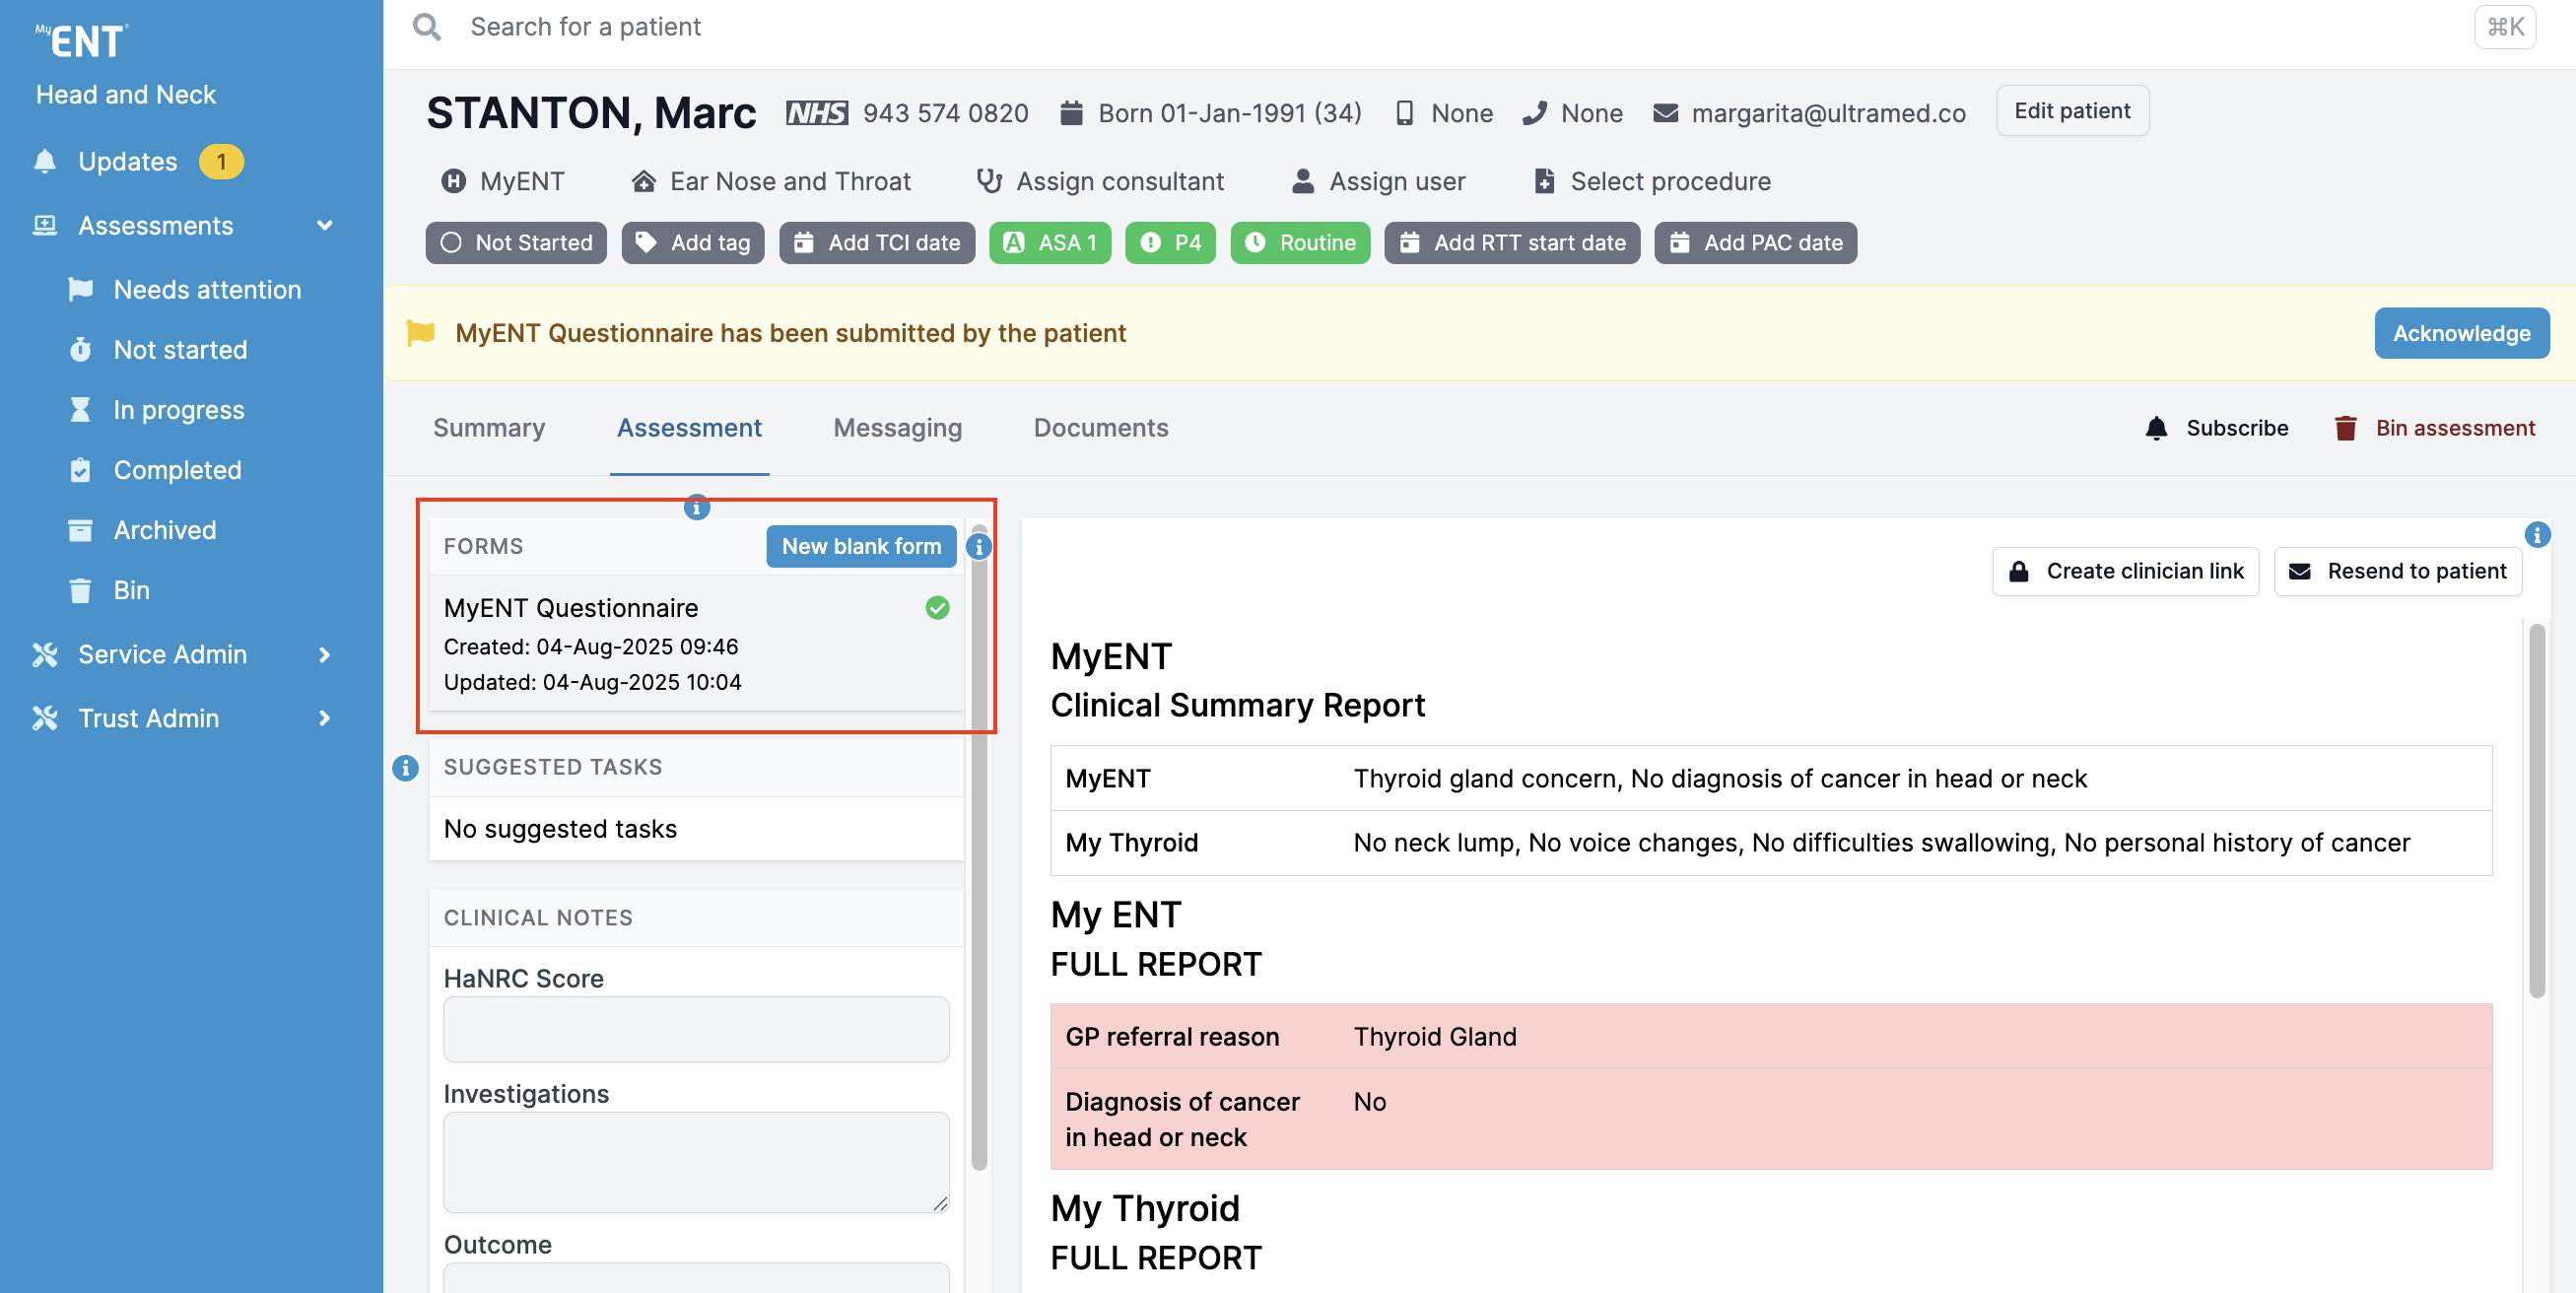
Moreover, you can view the status of the assessment by checking the icons on the right of the form list:
- Green - assessment submitted
- Amber - the form is empty or in progress
- Grey - a newer version of the form is available
- Red - invite failed to send
- Clear - invite has not been sent
How to edit an existing form or send a new form to the patient
Editing an existing assessment
To make changes to the existing form, use the buttons above the assessment.
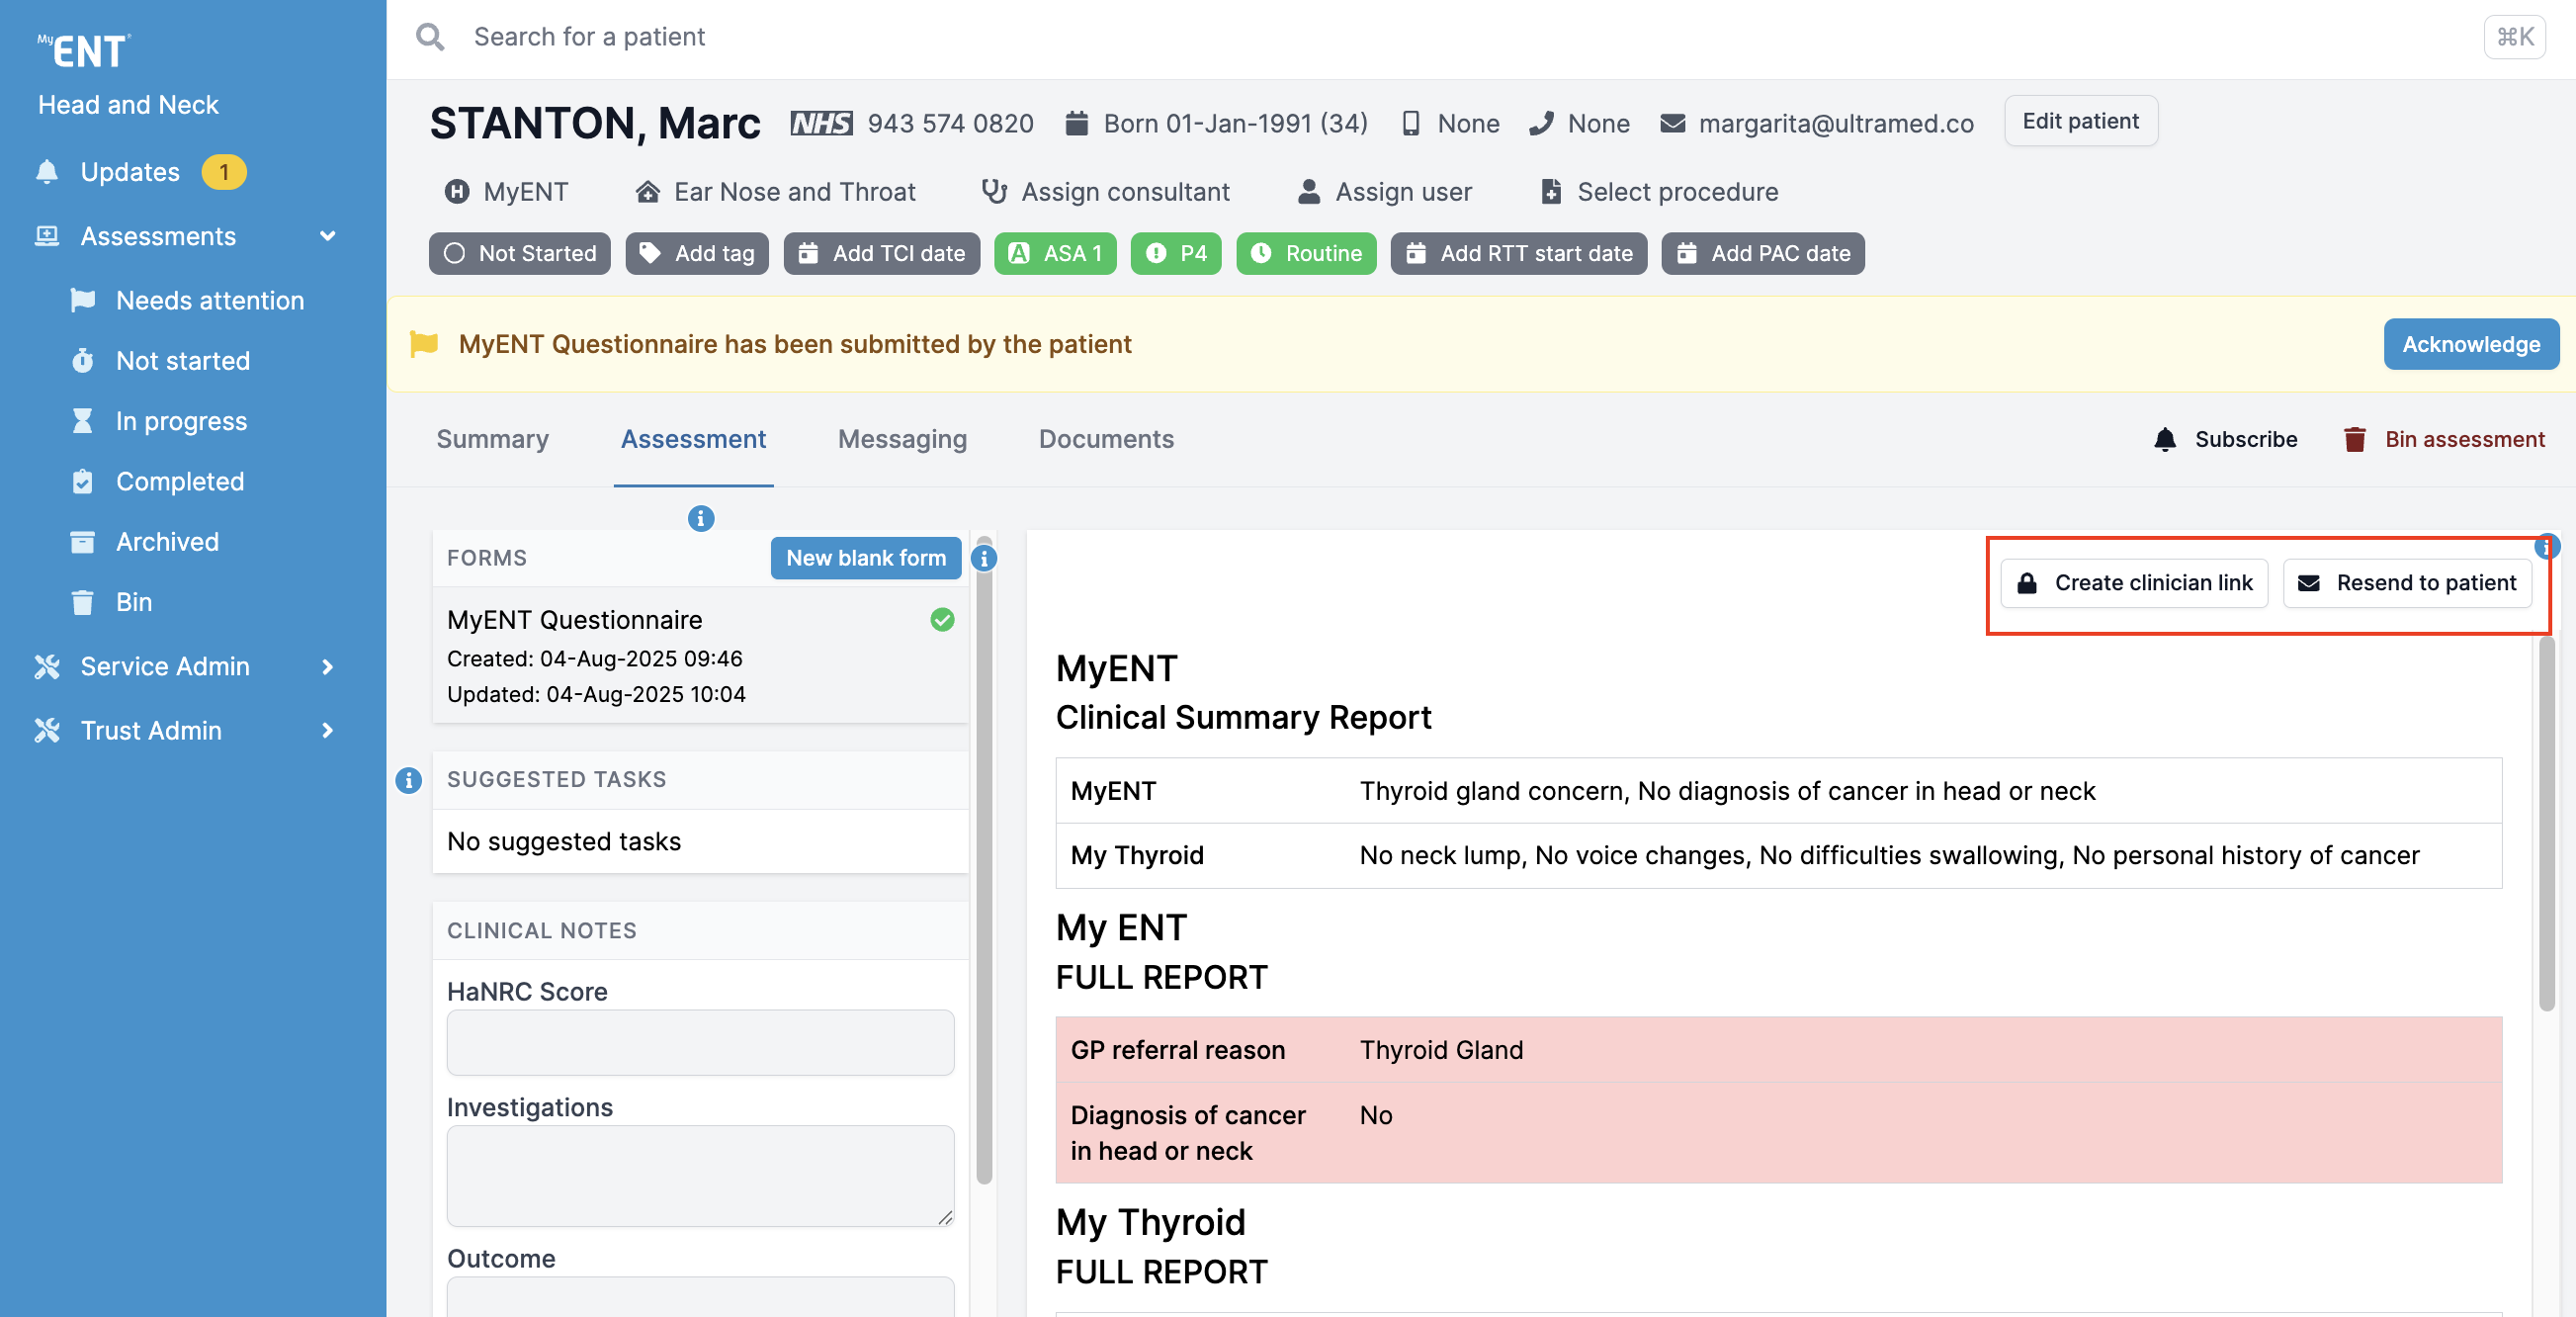
“Create clinician link” will allow you to access a patient's existing assessment and make changes or add to their answers.
“Resend to patient” will resend a new invite to the patient, enabling them to review and update the existing assessment.
“Cancel” button will allow you to cancel a patient's invite, preventing them from accessing the assessment. It will also reactivate the previous version of the same form.
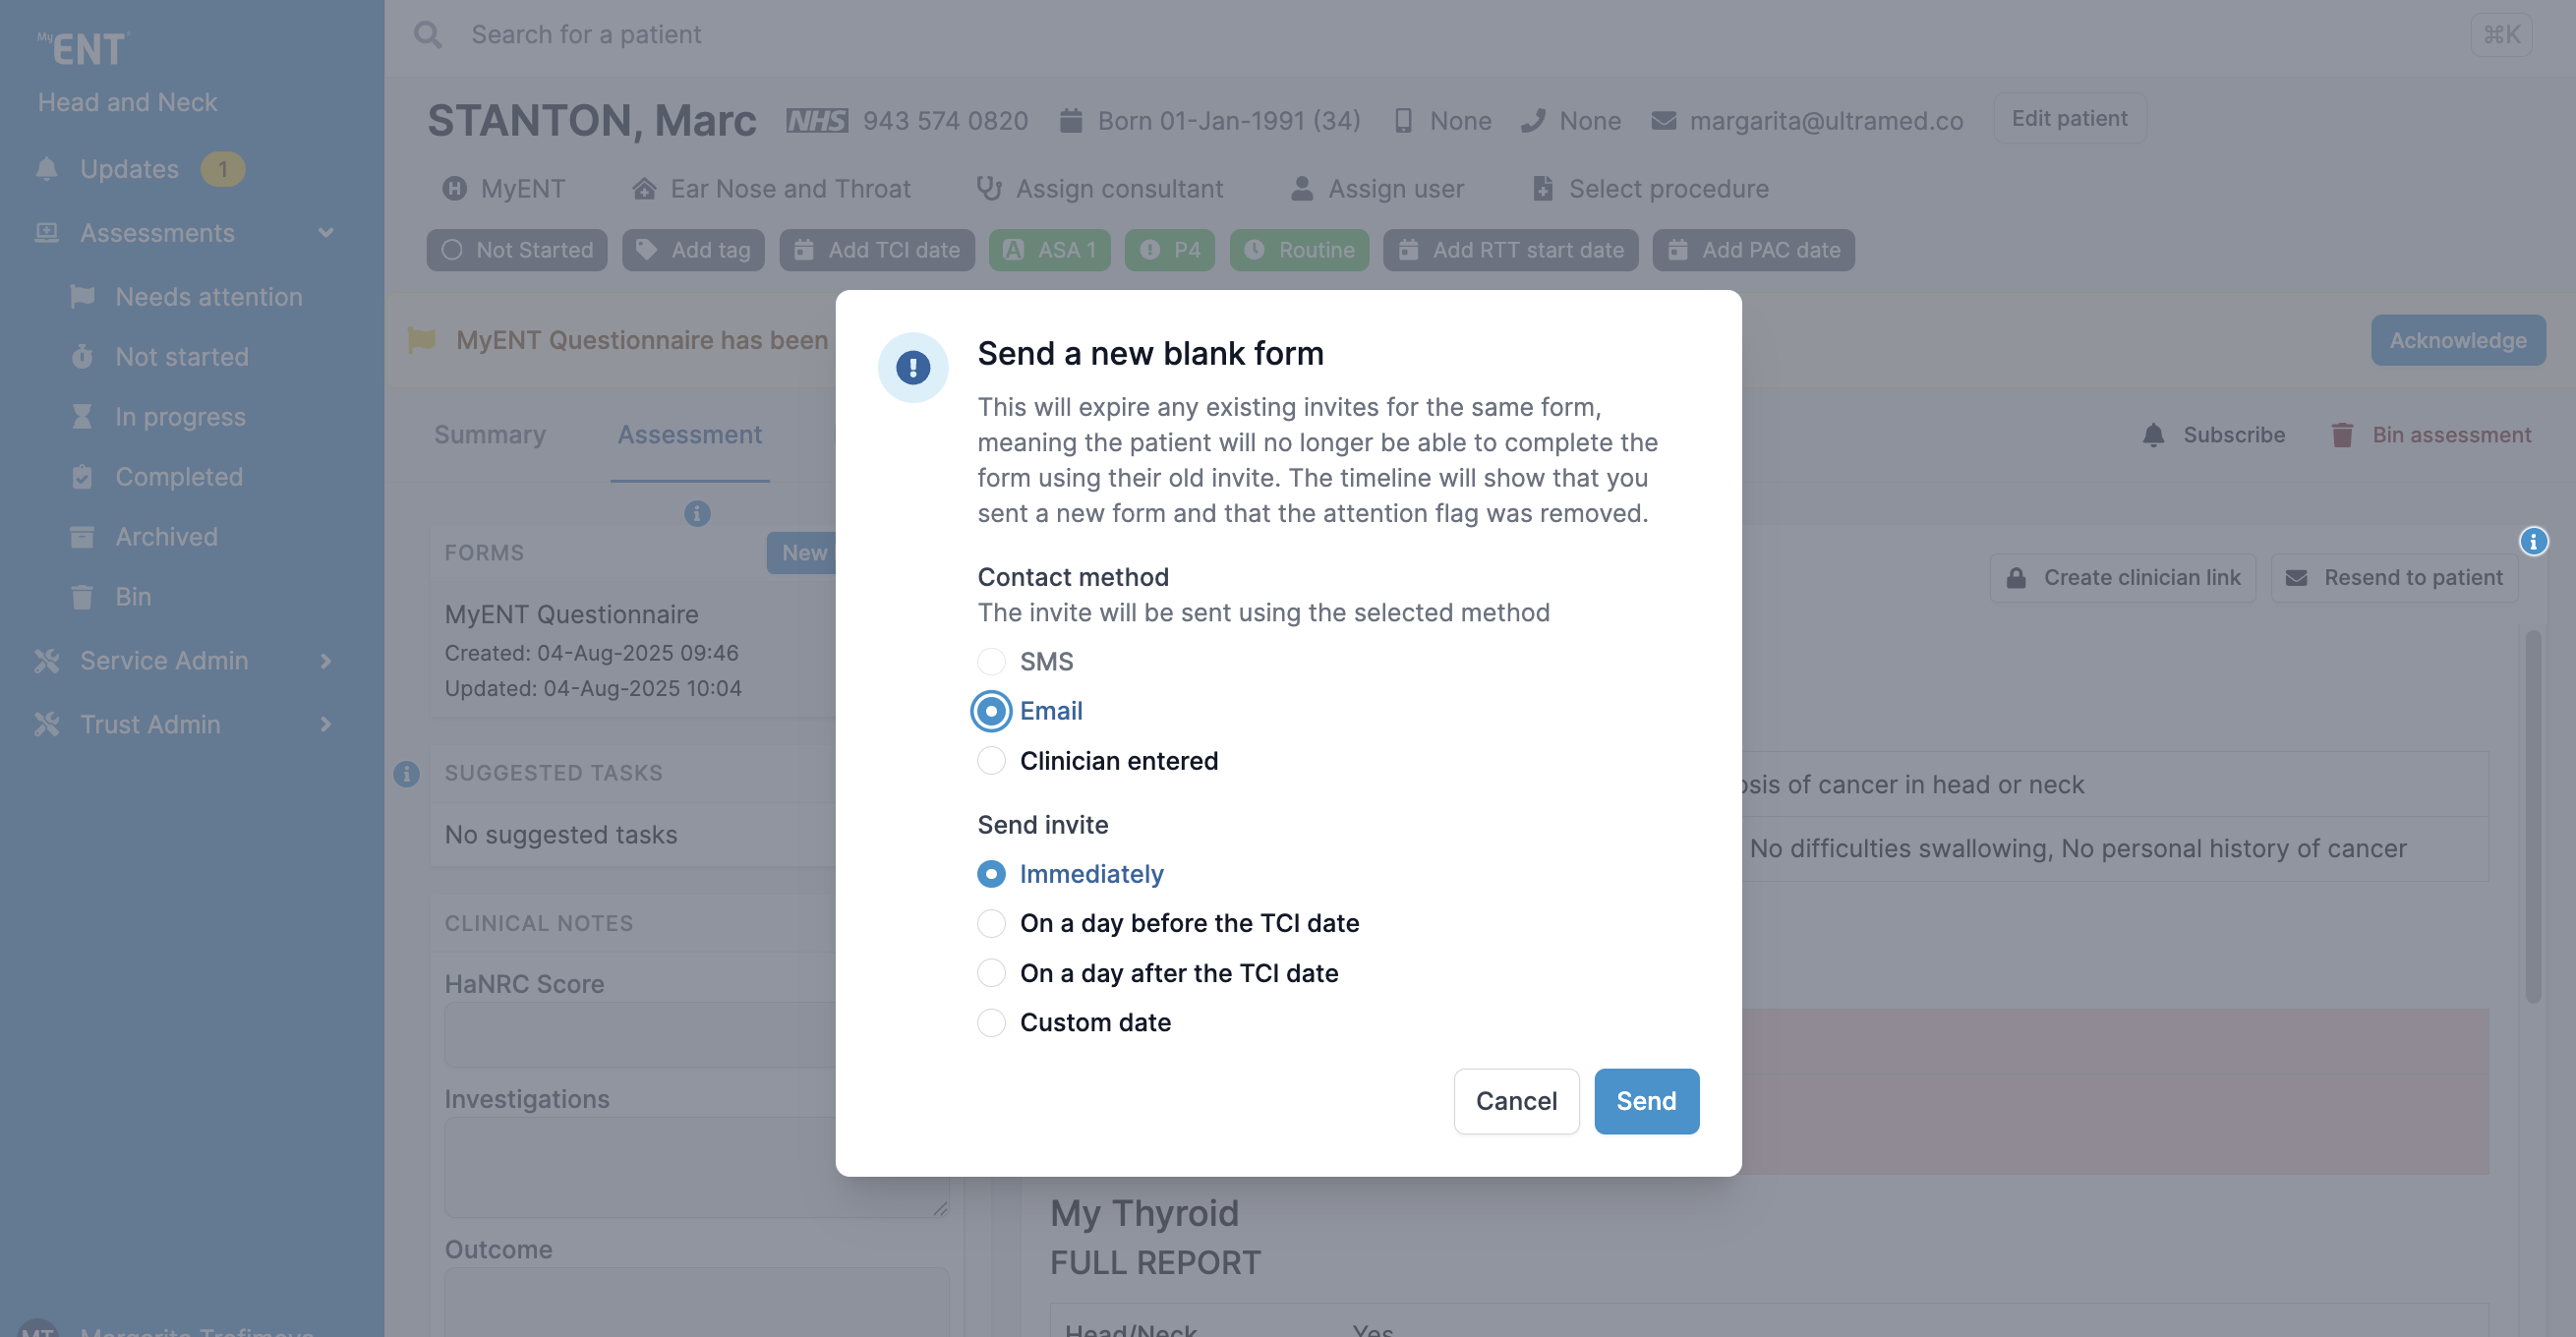
Creating a new form
“New blank form” will allow you to create a new assessment, without any pre-existing answers or progress from the patient. Once clicked, you will be able to choose the type of questionnaire, contact method, and when the invite should be sent.

To create a clinician link, select “Clinician entered” as your contact method.
Please note that by creating a new form, any existing invites for the same form will expire and the patient will no longer be able to complete it on their own. The timeline will also show that the new form was created and any attention flags related to the form will be removed.
How to identify and review changes made to questionnaires
Updated questionnaires automatically highlight any questions that have changed since the last submission. Changed questions are marked with a change indicator and highlighted border:
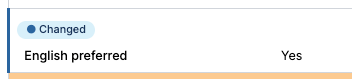
Change indicator applies whether an answer was:
- Added
- Updated
- Removed
To view an earlier response use the form list on the left-hand side.
Note:
- Some sections are highlighted as a whole, rather than showing changes to individual items. For example, if any medication is added, removed, or updated, the entire Medications section will be highlighted.

- Changes are always compared to the most recent previous form, not the original. For example, if the patient has three submissions, the changes in the third(most recent) form will appear against the second form, and changes in the second form will highlight changes against the first form. This ensures you always see what has changed since the last review.
Additional information:
- Change highlights appear only after a questionnaire has been submitted more than once.
- Highlights are visible in the clinician portal only and do not appear in PDF exports.
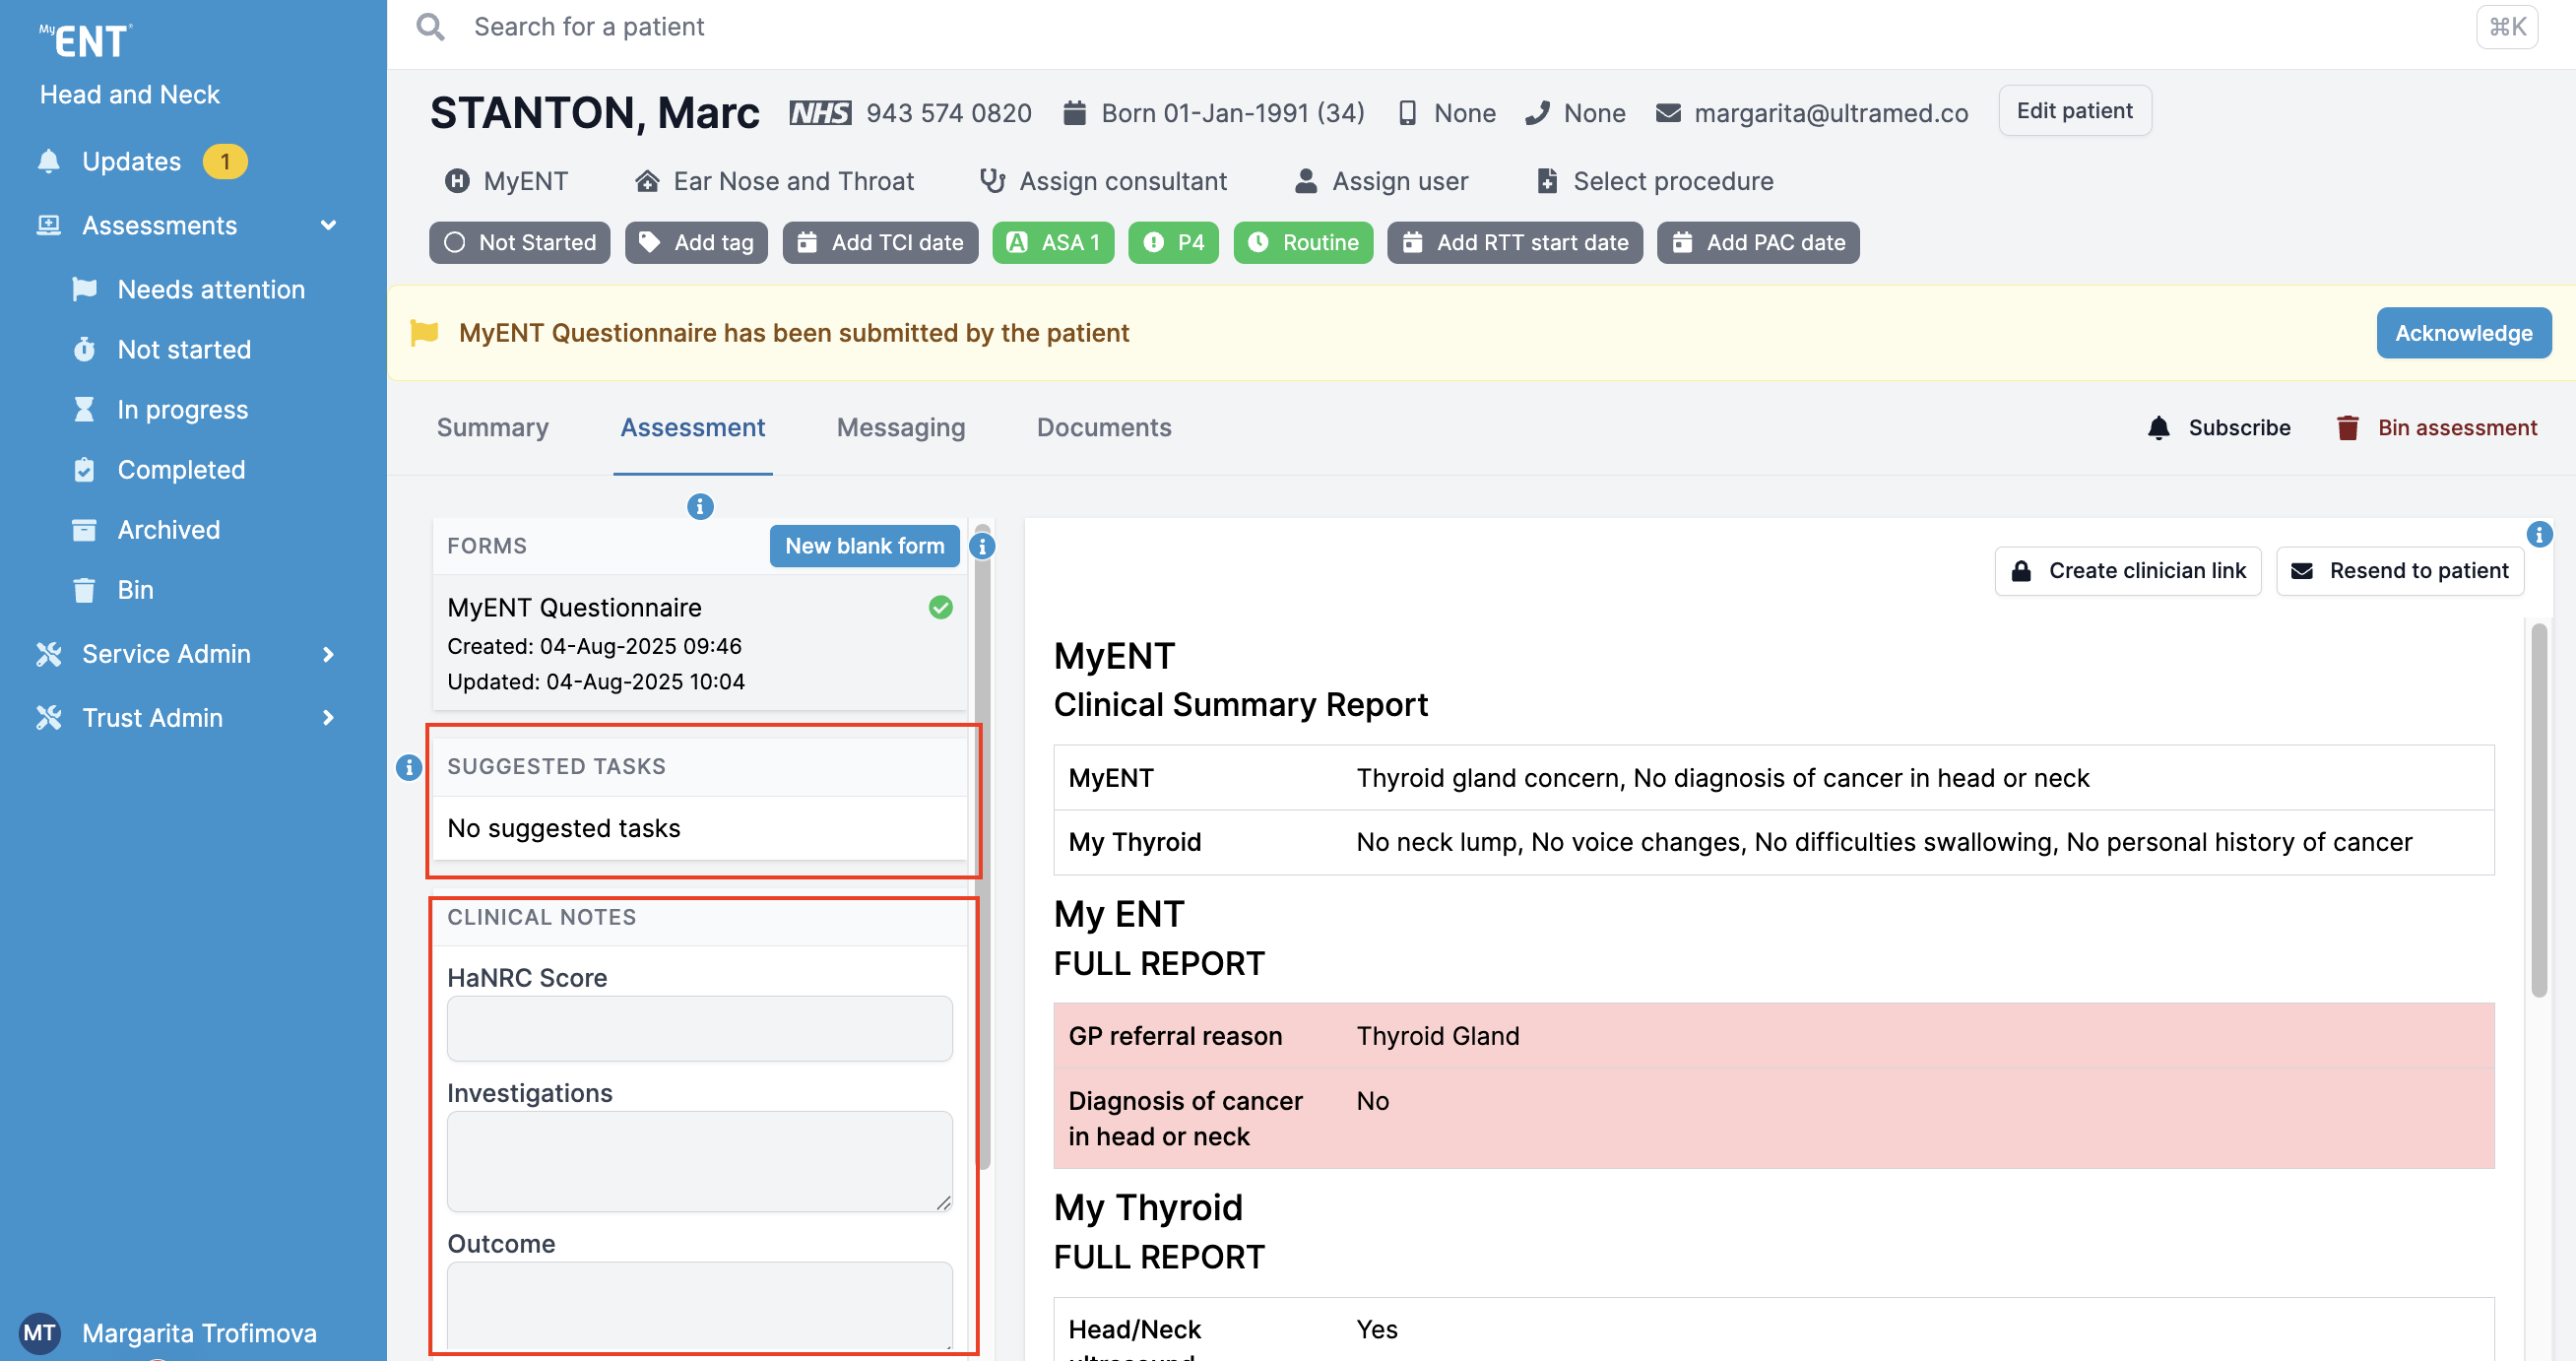
Clinical notes and Suggested tasks
On the left hand side of the Assessment tab, you will see Suggested Tasks. You can click on each task and make any necessary changes and add notes. Remember to click ‘Save’ when done.
Scrolling down in the left-hand tab, you will also find the Clinical Notes. To make changes, click the ‘Edit’ button and then click ‘Save’ when complete.
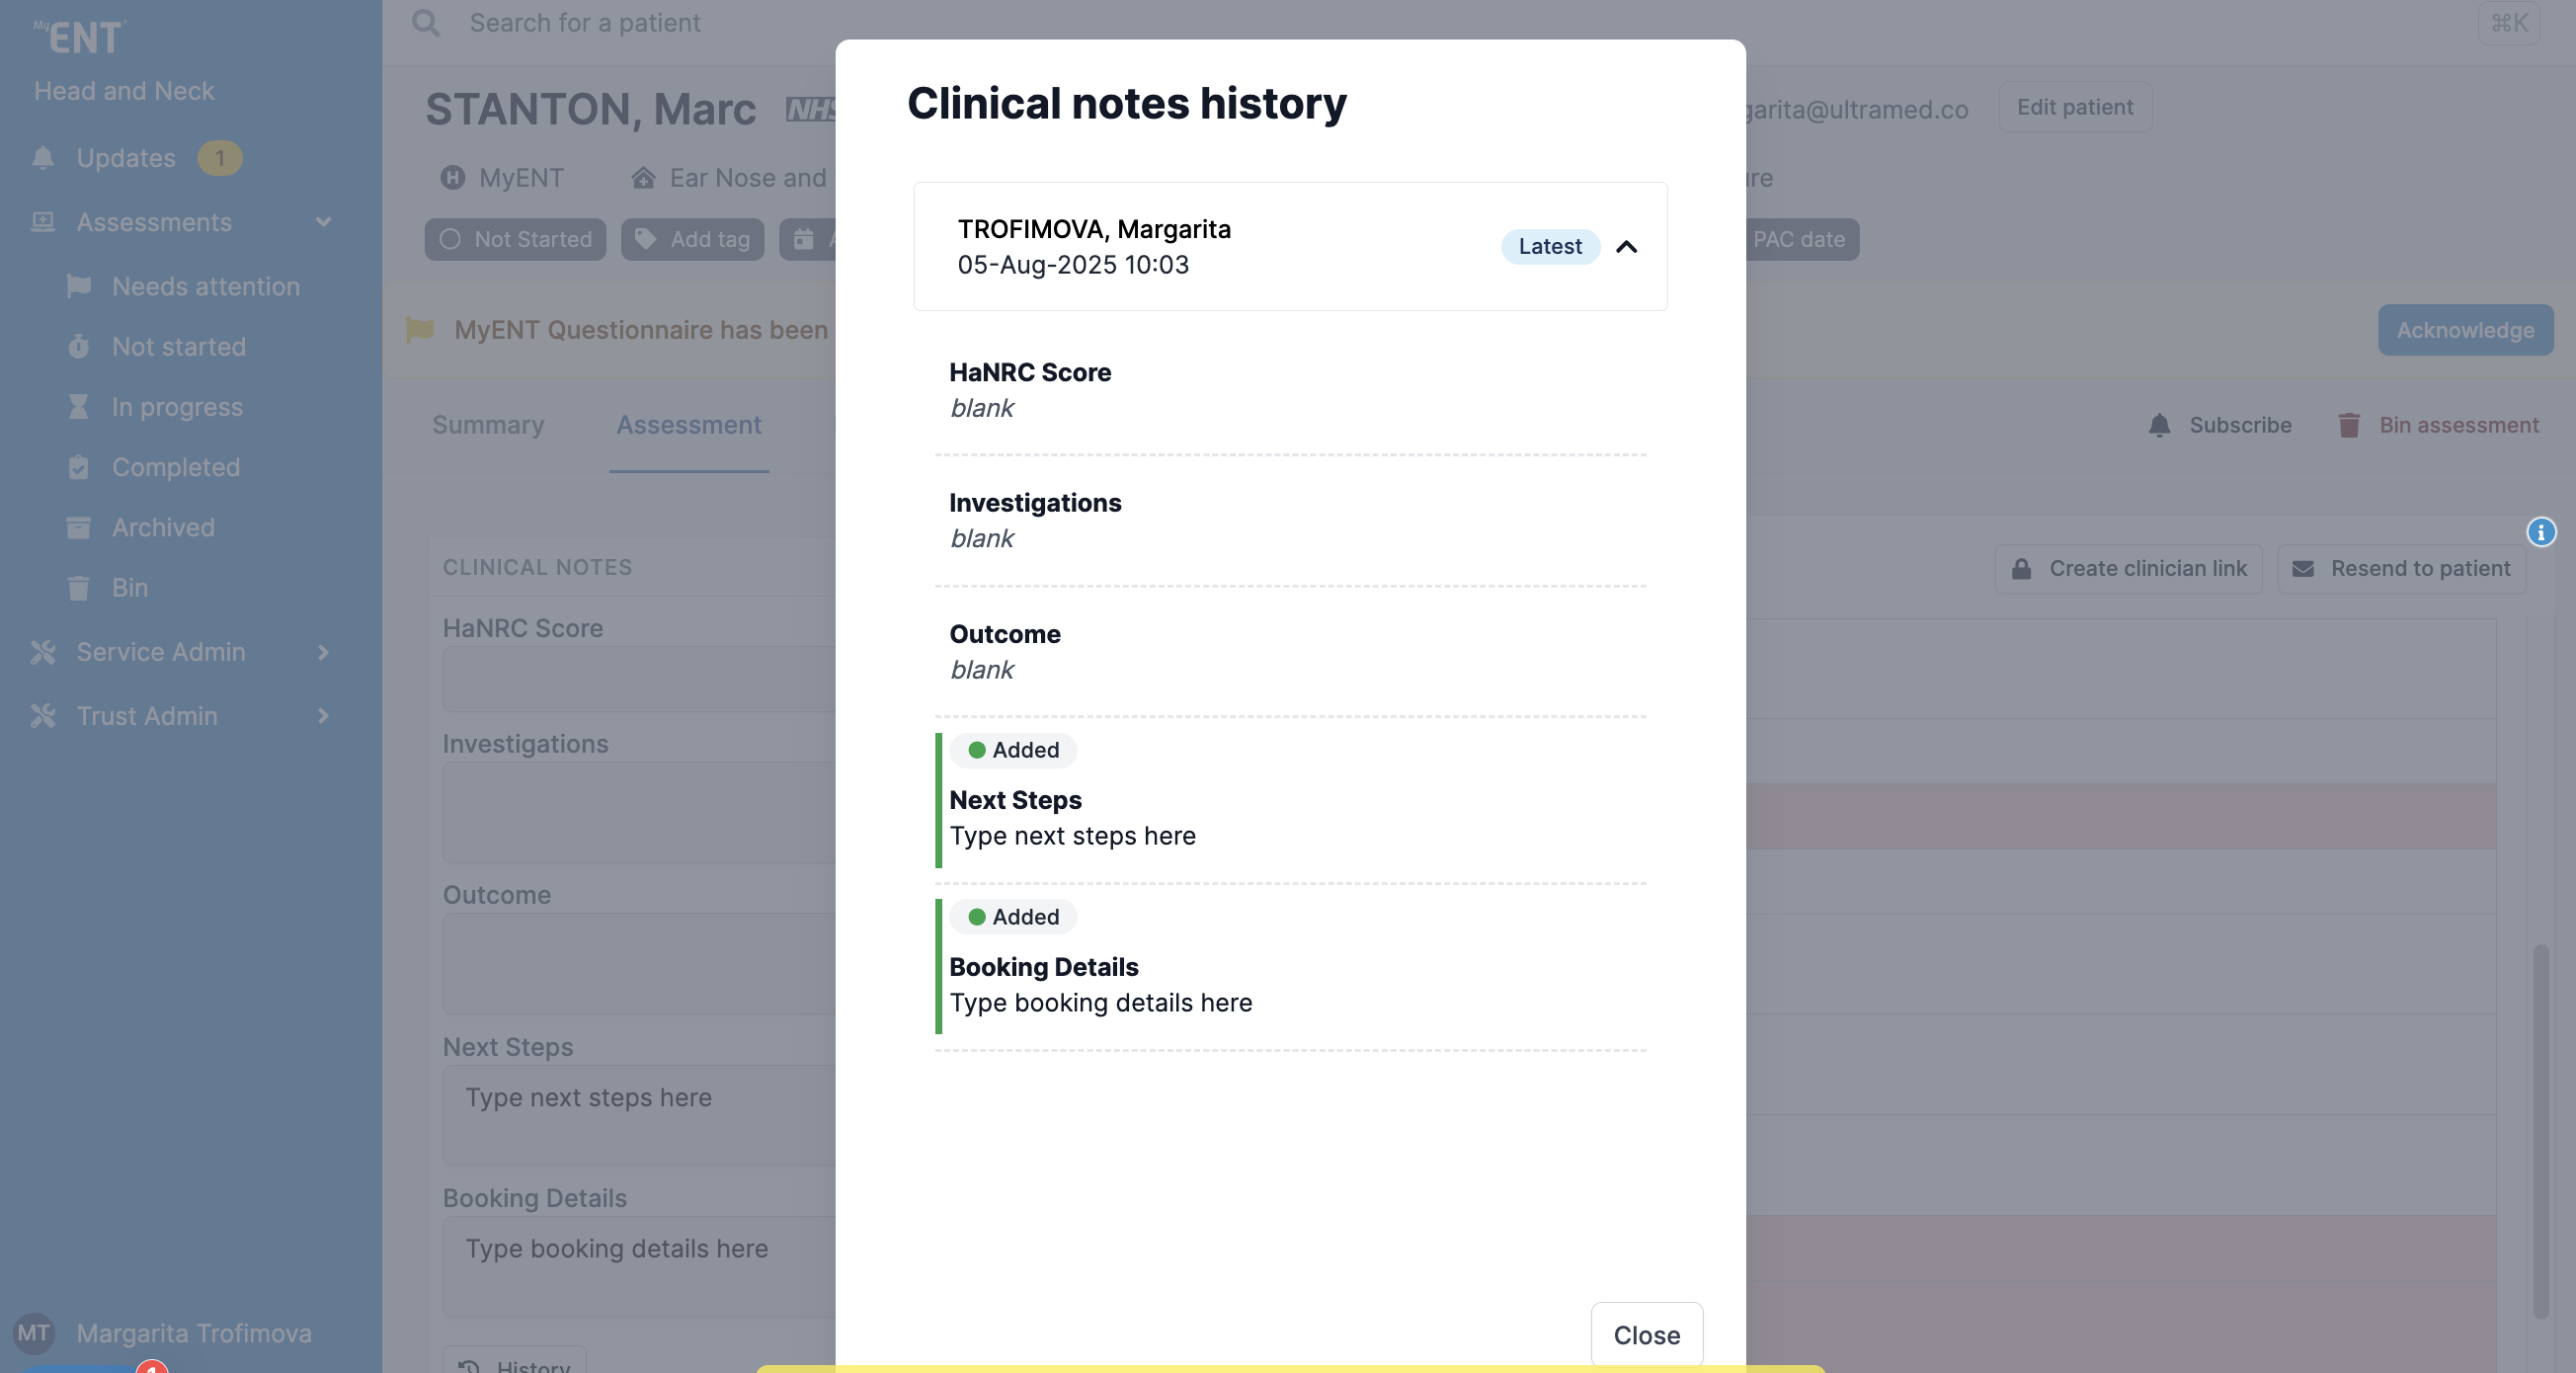
Clinical Noting History
"History" button in the bottom left corner allow the users to view the history of the clinical notes, as well as trace their authors.
Once you click on the "History" button, a pop up will appear, showing the timeline of the updates. You can expand each update to view the changes.
Please note that these changes are only available for the assessments created after 10th of February 2025.
Multiple Clinical Notes Editors Warning
The system will also warn you about saving the changes, in case multiple users are editing the same clinical noting section:
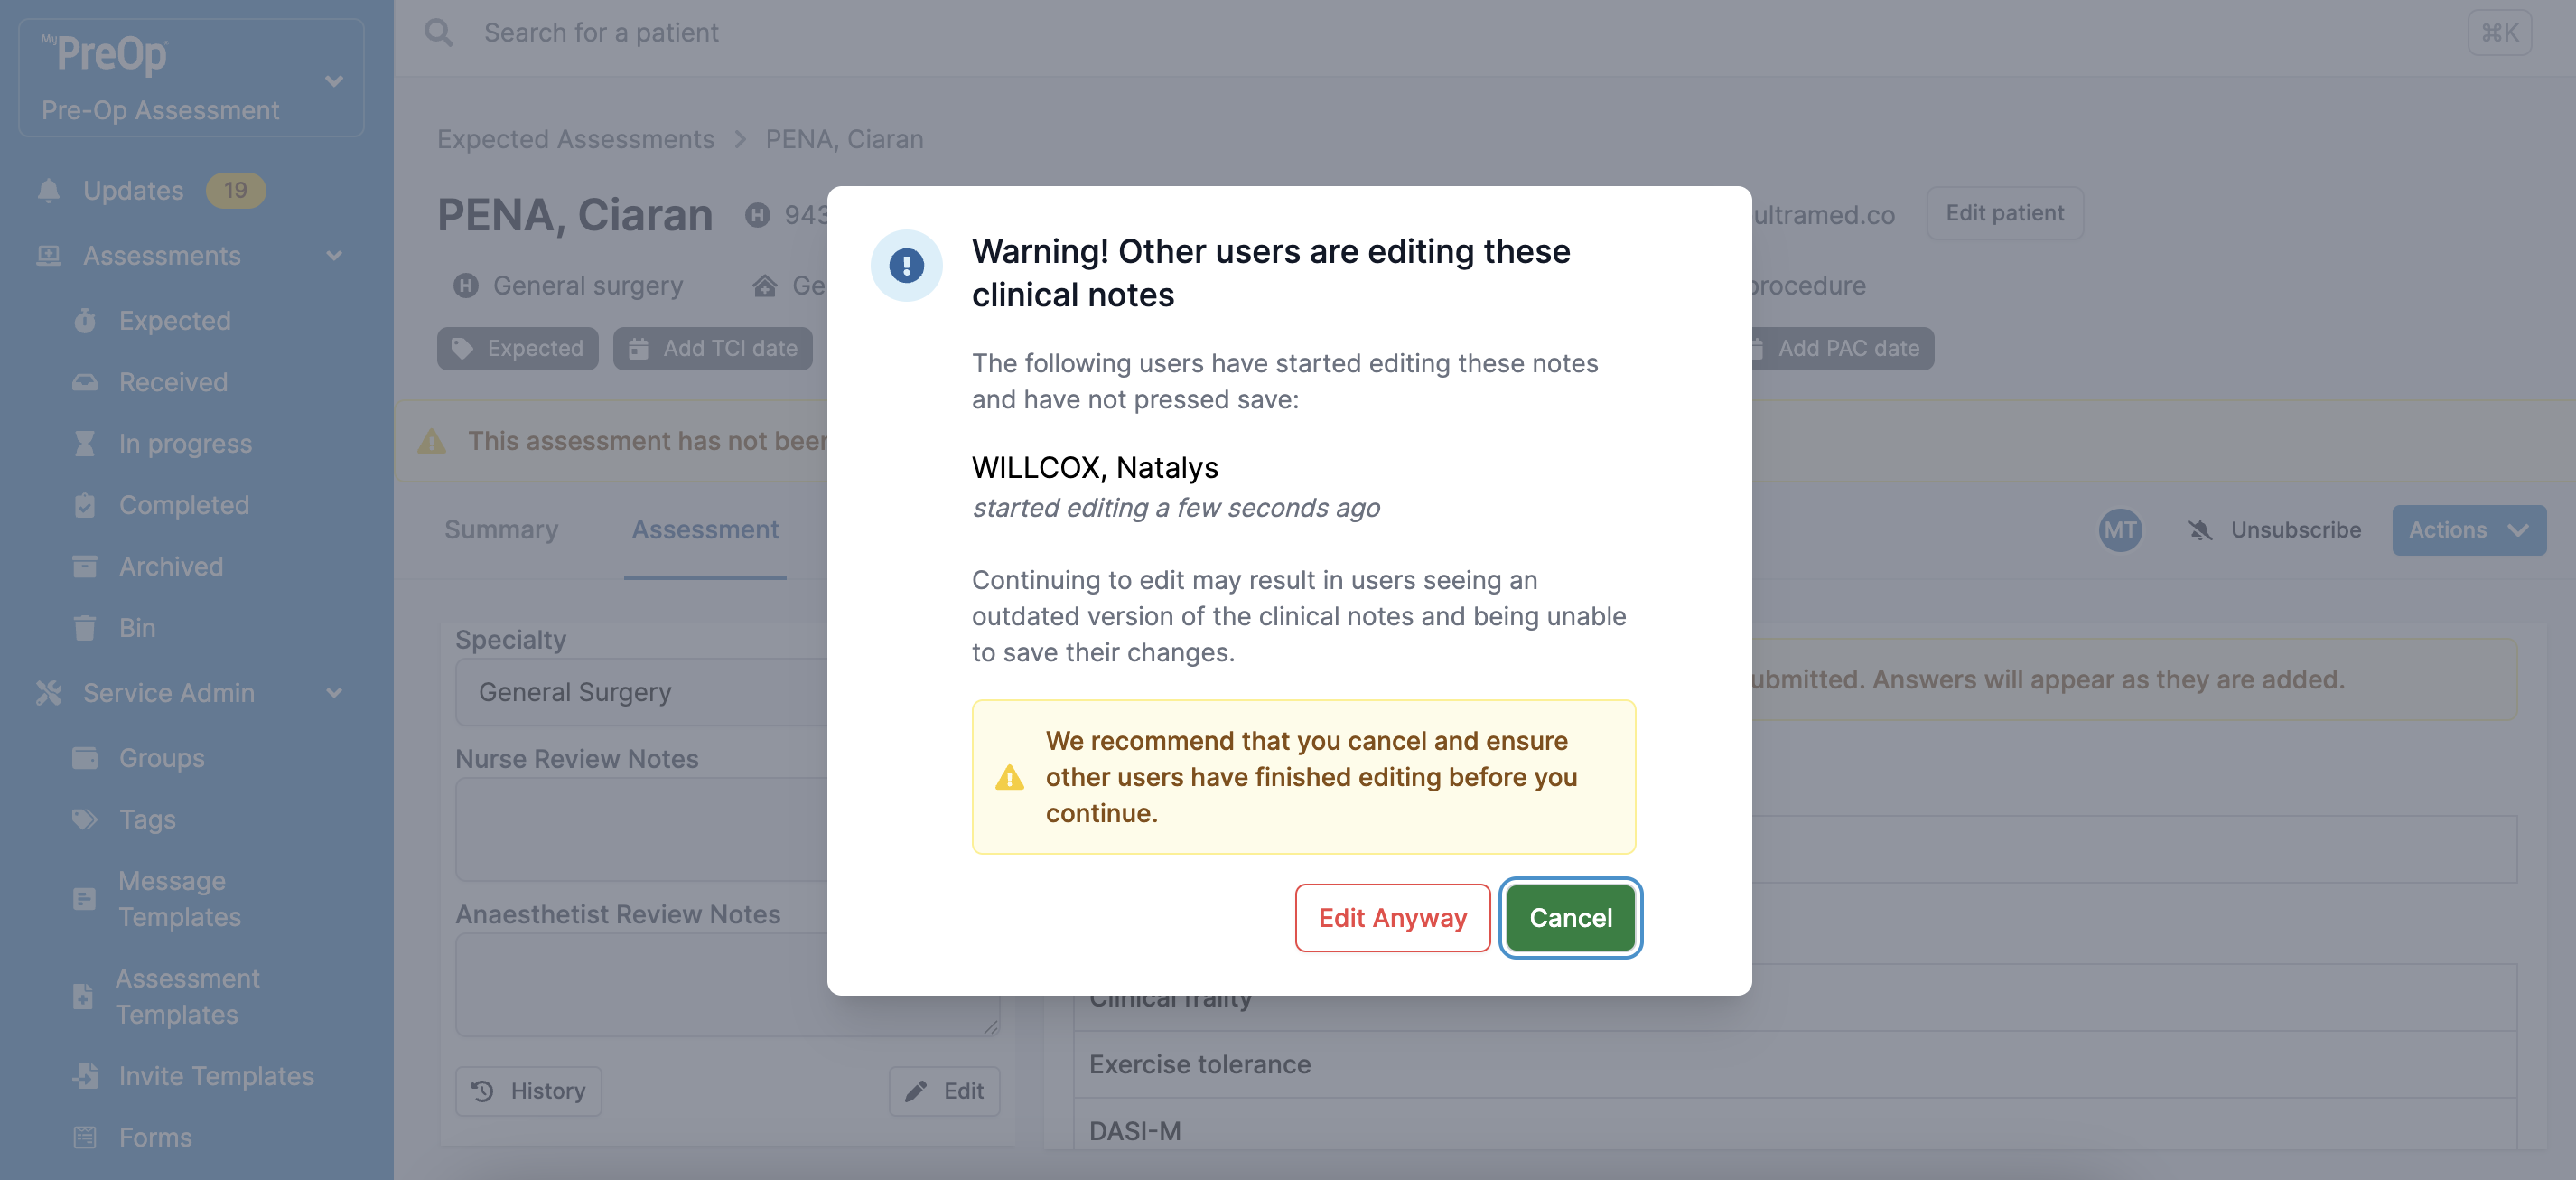
You can choose to continue editing or cancel your changes. In this case, the Timeline will record your decision:
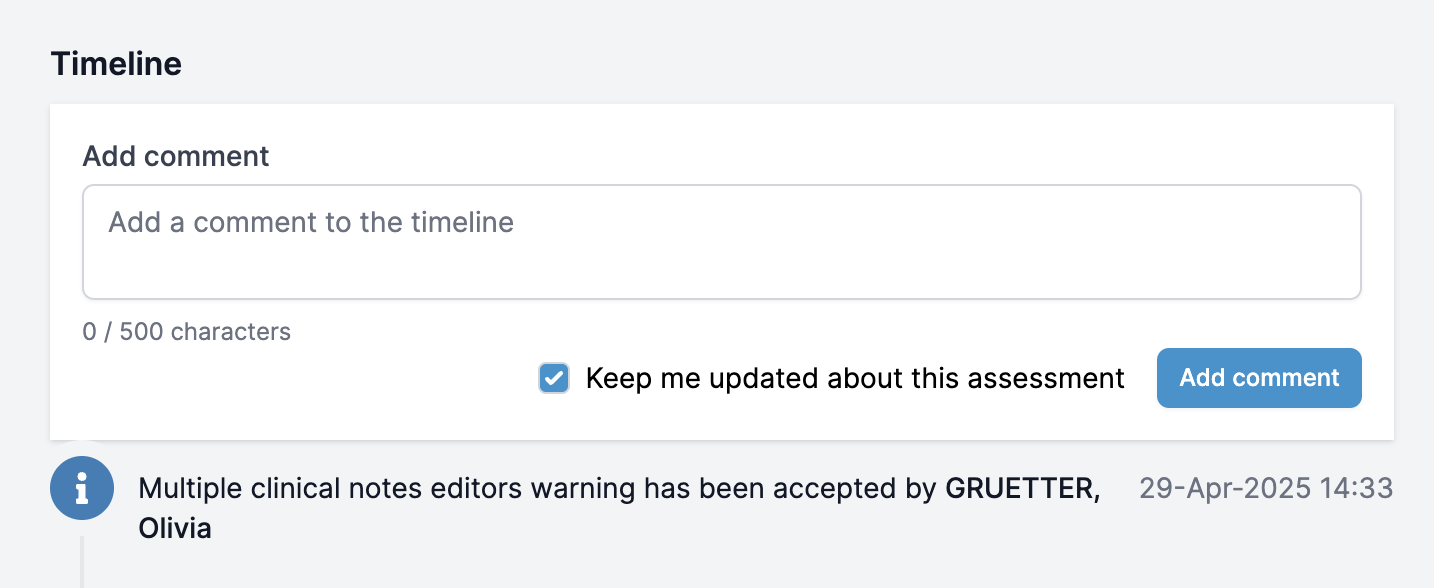
It is important to note that continuing to edit may result in users seeing an outdated version of the clinical notes and being unable to save their changes.
Please note that due to individual portal configurations, some features might look different in your live portal.